Long-running tasks done easy

How Windmill makes handling long-running tasks a breeze.
## Introduction
Every software engineer encounters the challenge of handling long-running tasks at some point in their lives. Be it processing large datasets, generating complex reports, or, as in the case we’ll consider in this blog post, calling out to some external service that takes a while to complete, etc. Numerous things could go wrong — workers going down, a random error shutting the whole process down with no ability to retry without re-running the entire thing, tracking progress, complex code scattered across multiple entry points, and so on.
There are way too many ways to approach a long-running task. The obvious one is implementing something yourself, e.g., with queues, but you shouldn’t bother, I’ll tell you that much for free. You’ll end up in an infinite loop of constantly patching stuff, and you won’t even get to solving the problem you initially tried to solve. Building it yourself may sound enticing, but doing so is NOT to be underestimated. But don't just take my word for it; look online, and you will see many who have fallen for the same trap.
So many workflow engines and process orchestration platforms exist nowadays that I honestly cannot keep count. Most solutions I’ve stumbled across, though, are either an absolute pain to set up, carry a truckload of infrastructural complexity with them, limit you significantly in terms of what you can and can’t do, or are just plain expensive. For example, if you want to set up Airflow with more than one worker, you need either Celery or Kubernetes.
Enter Windmill, a no-nonsense, feature-packed, self-hostable job orchestrator. It is straightforward to set up; its only infrastructural dependency is Postgres; it allows you to write scripts in many languages (yes, even PHP) and piece them together in whatever way you like. It also allows you to build internal tools with minimal effort and has many prebuilt integrations. Also, it’s open source. For a more in-depth comparison between Windmill and its competitors, check Windmill’s documentation.
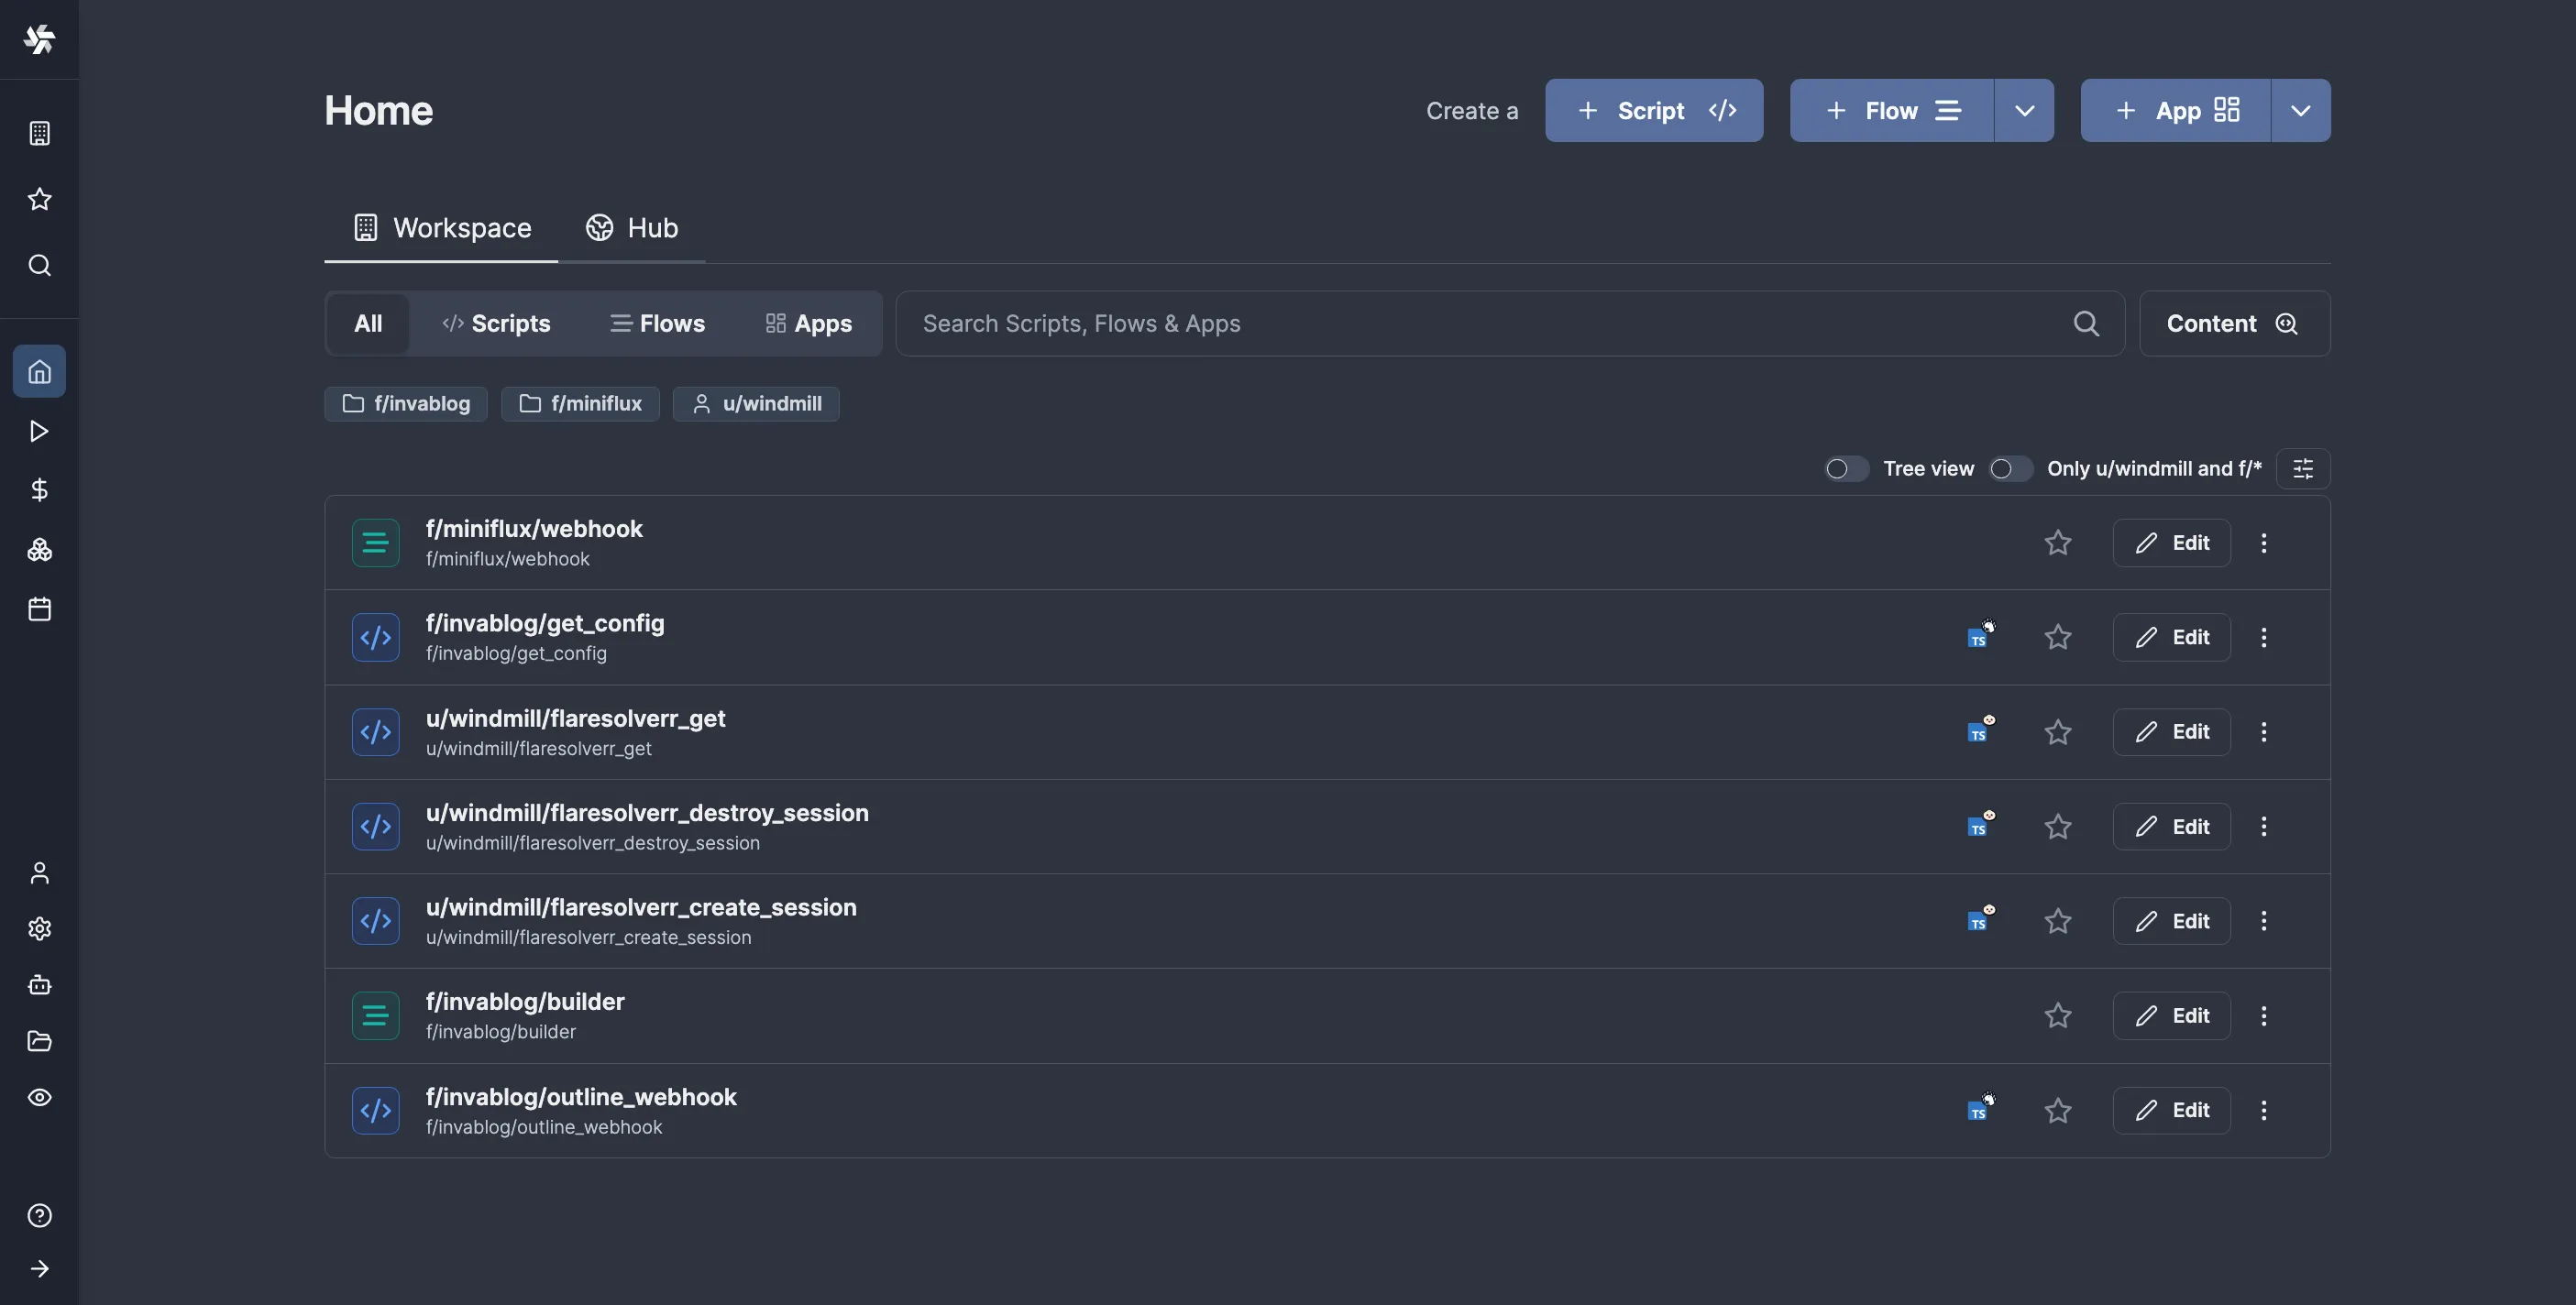
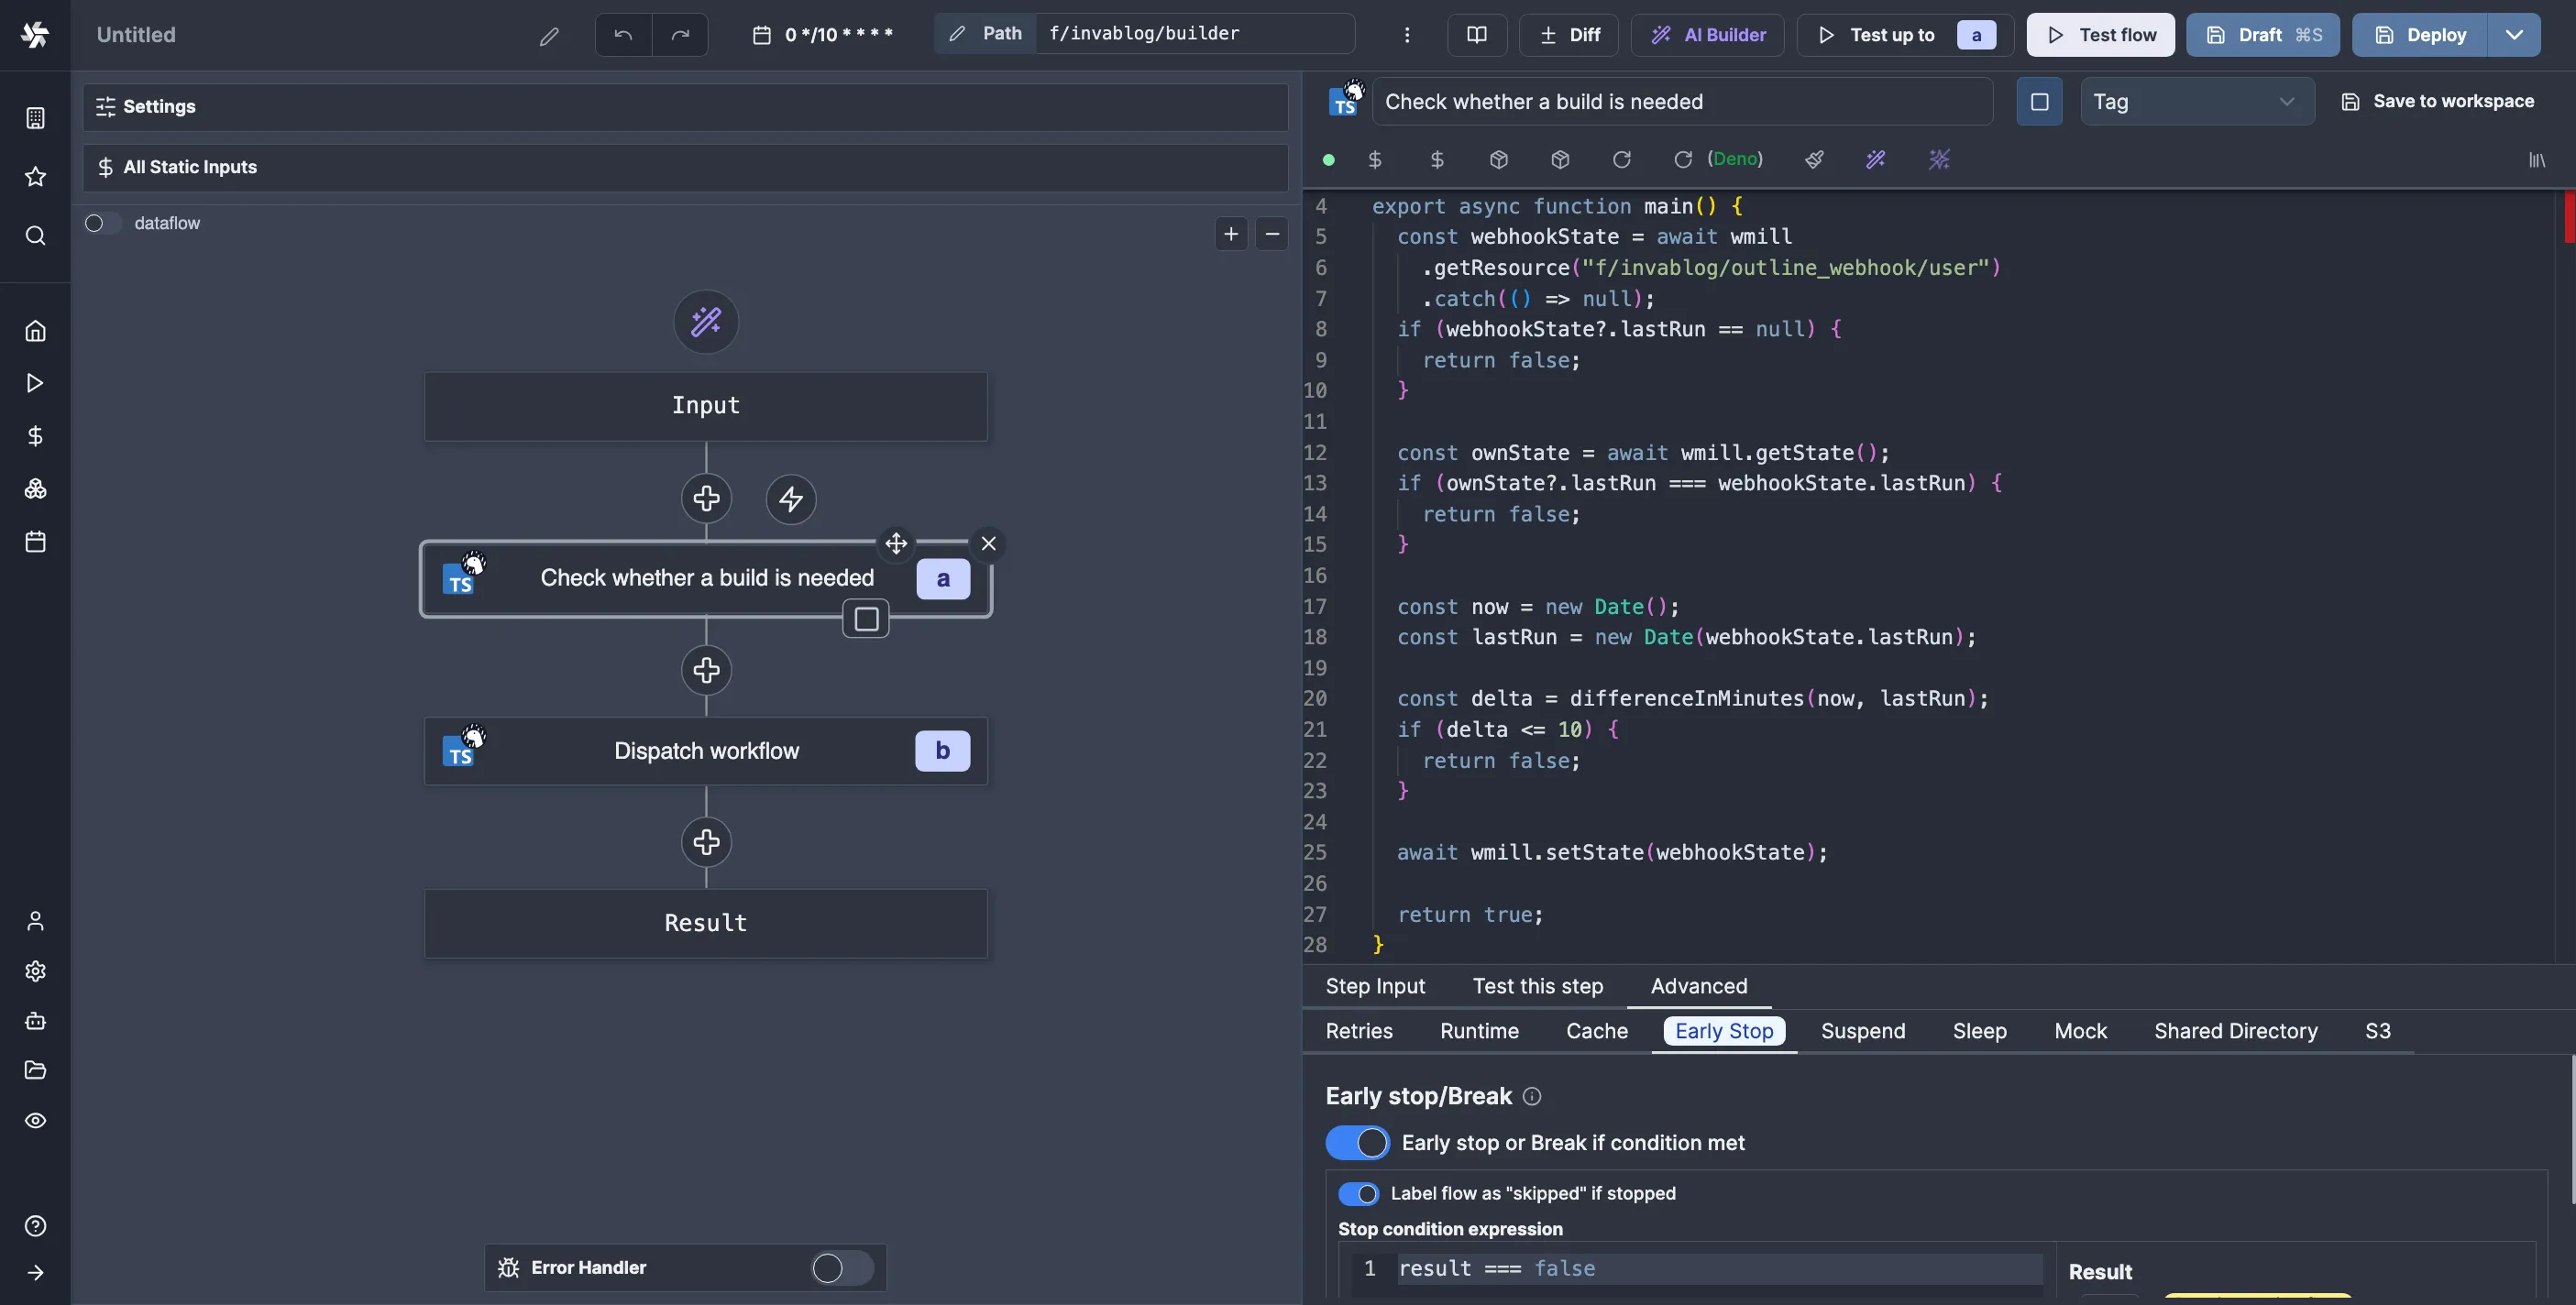
Ever since discovering Windmill, I’ve been using it for virtually everything. It’s great for quick prototyping, CRON jobs, webhook handlers, etc. For example, I use it as the glue between Outline and GitHub Actions for this very blog. Whenever I publish/edit a blog post (which I organize as notes in a specific collection), Outline triggers a Windmill flow that updates a timestamp in a Windmill state resource, which is then checked by a separate flow (shown below) that runs on a schedule to see if it needs to trigger a build, the point being to “debounce” builds so that I don’t rebuild on every single edit.
That’s enough Windmill shilling for a single post, so let’s get to the point. In this post, we’ll explore how to handle long-running tasks with the help of Windmill. The particular example I’ve chosen is transcribing audio files using AssemblyAI. We’ll build a Windmill flow that uploads an audio file to S3, runs a transcribe task, receives the results via a webhook, and posts them to a Discord channel.
## Setting up
I will be using my self-hosted Windmill and MinIO deployments. The setup instructions are here if you want to follow along.
First, we will set up Windmill's S3 integration to handle the S3 uploading part of the task. To do this, we must create an S3 Windmill resource in the workspace and select it in the settings. I already have an S3 bucket prepared for this; if you don’t have one, you must first create one.
So, let’s open the Resources page and click “Add Resource”. For the resource type, we’ll choose “s3”, then fill in the details:

u/windmill/s3. Before clicking “Next,” click “Test connection” to ensure you’ve configured everything correctly.
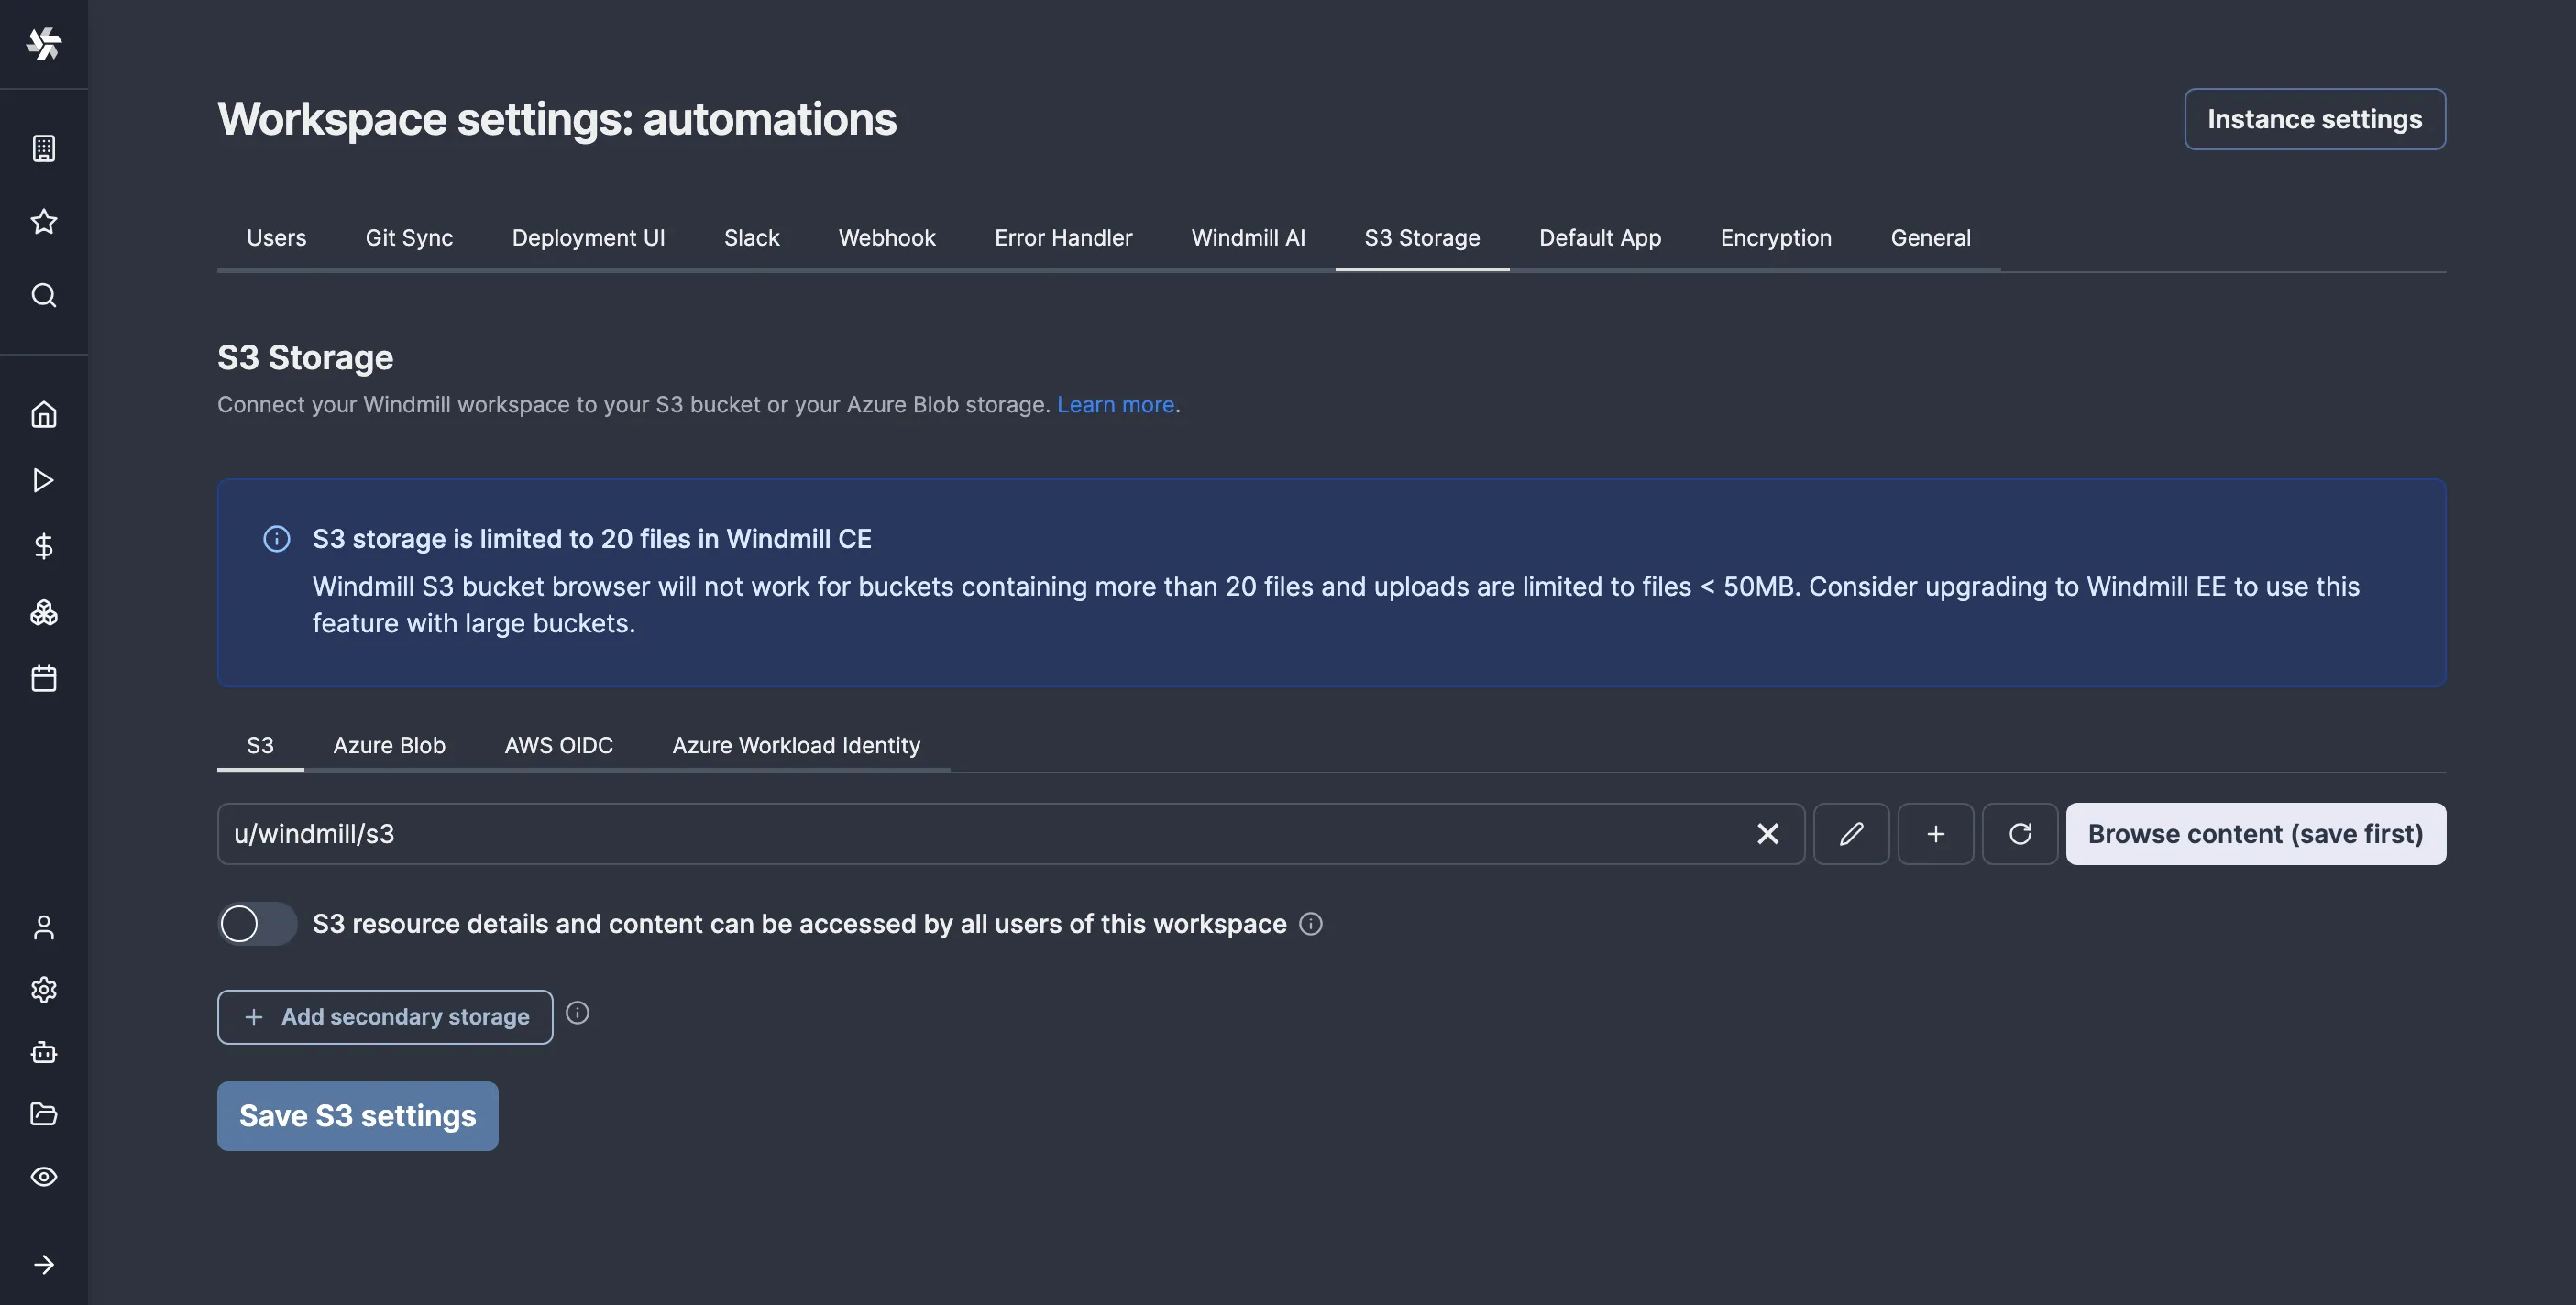
After creating the resource, go to “Settings > Workspace”, then to the “S3 Storage” tab, and select your S3 resource as shown, then save:
While we’re at it, let’s also define a resource for our AssemblyAI API key. At the time of writing this, Windmill has no official resource type for AssemblyAI, but thankfully, we can make our own. For this, we’ll return to the “Resources” page and click “Add Resource Type”. Custom resource types in Windmill usually have a c_ prefix to avoid clashing with any official ones, so our resource type will be named c_assembly_ai. This is how I configured mine:
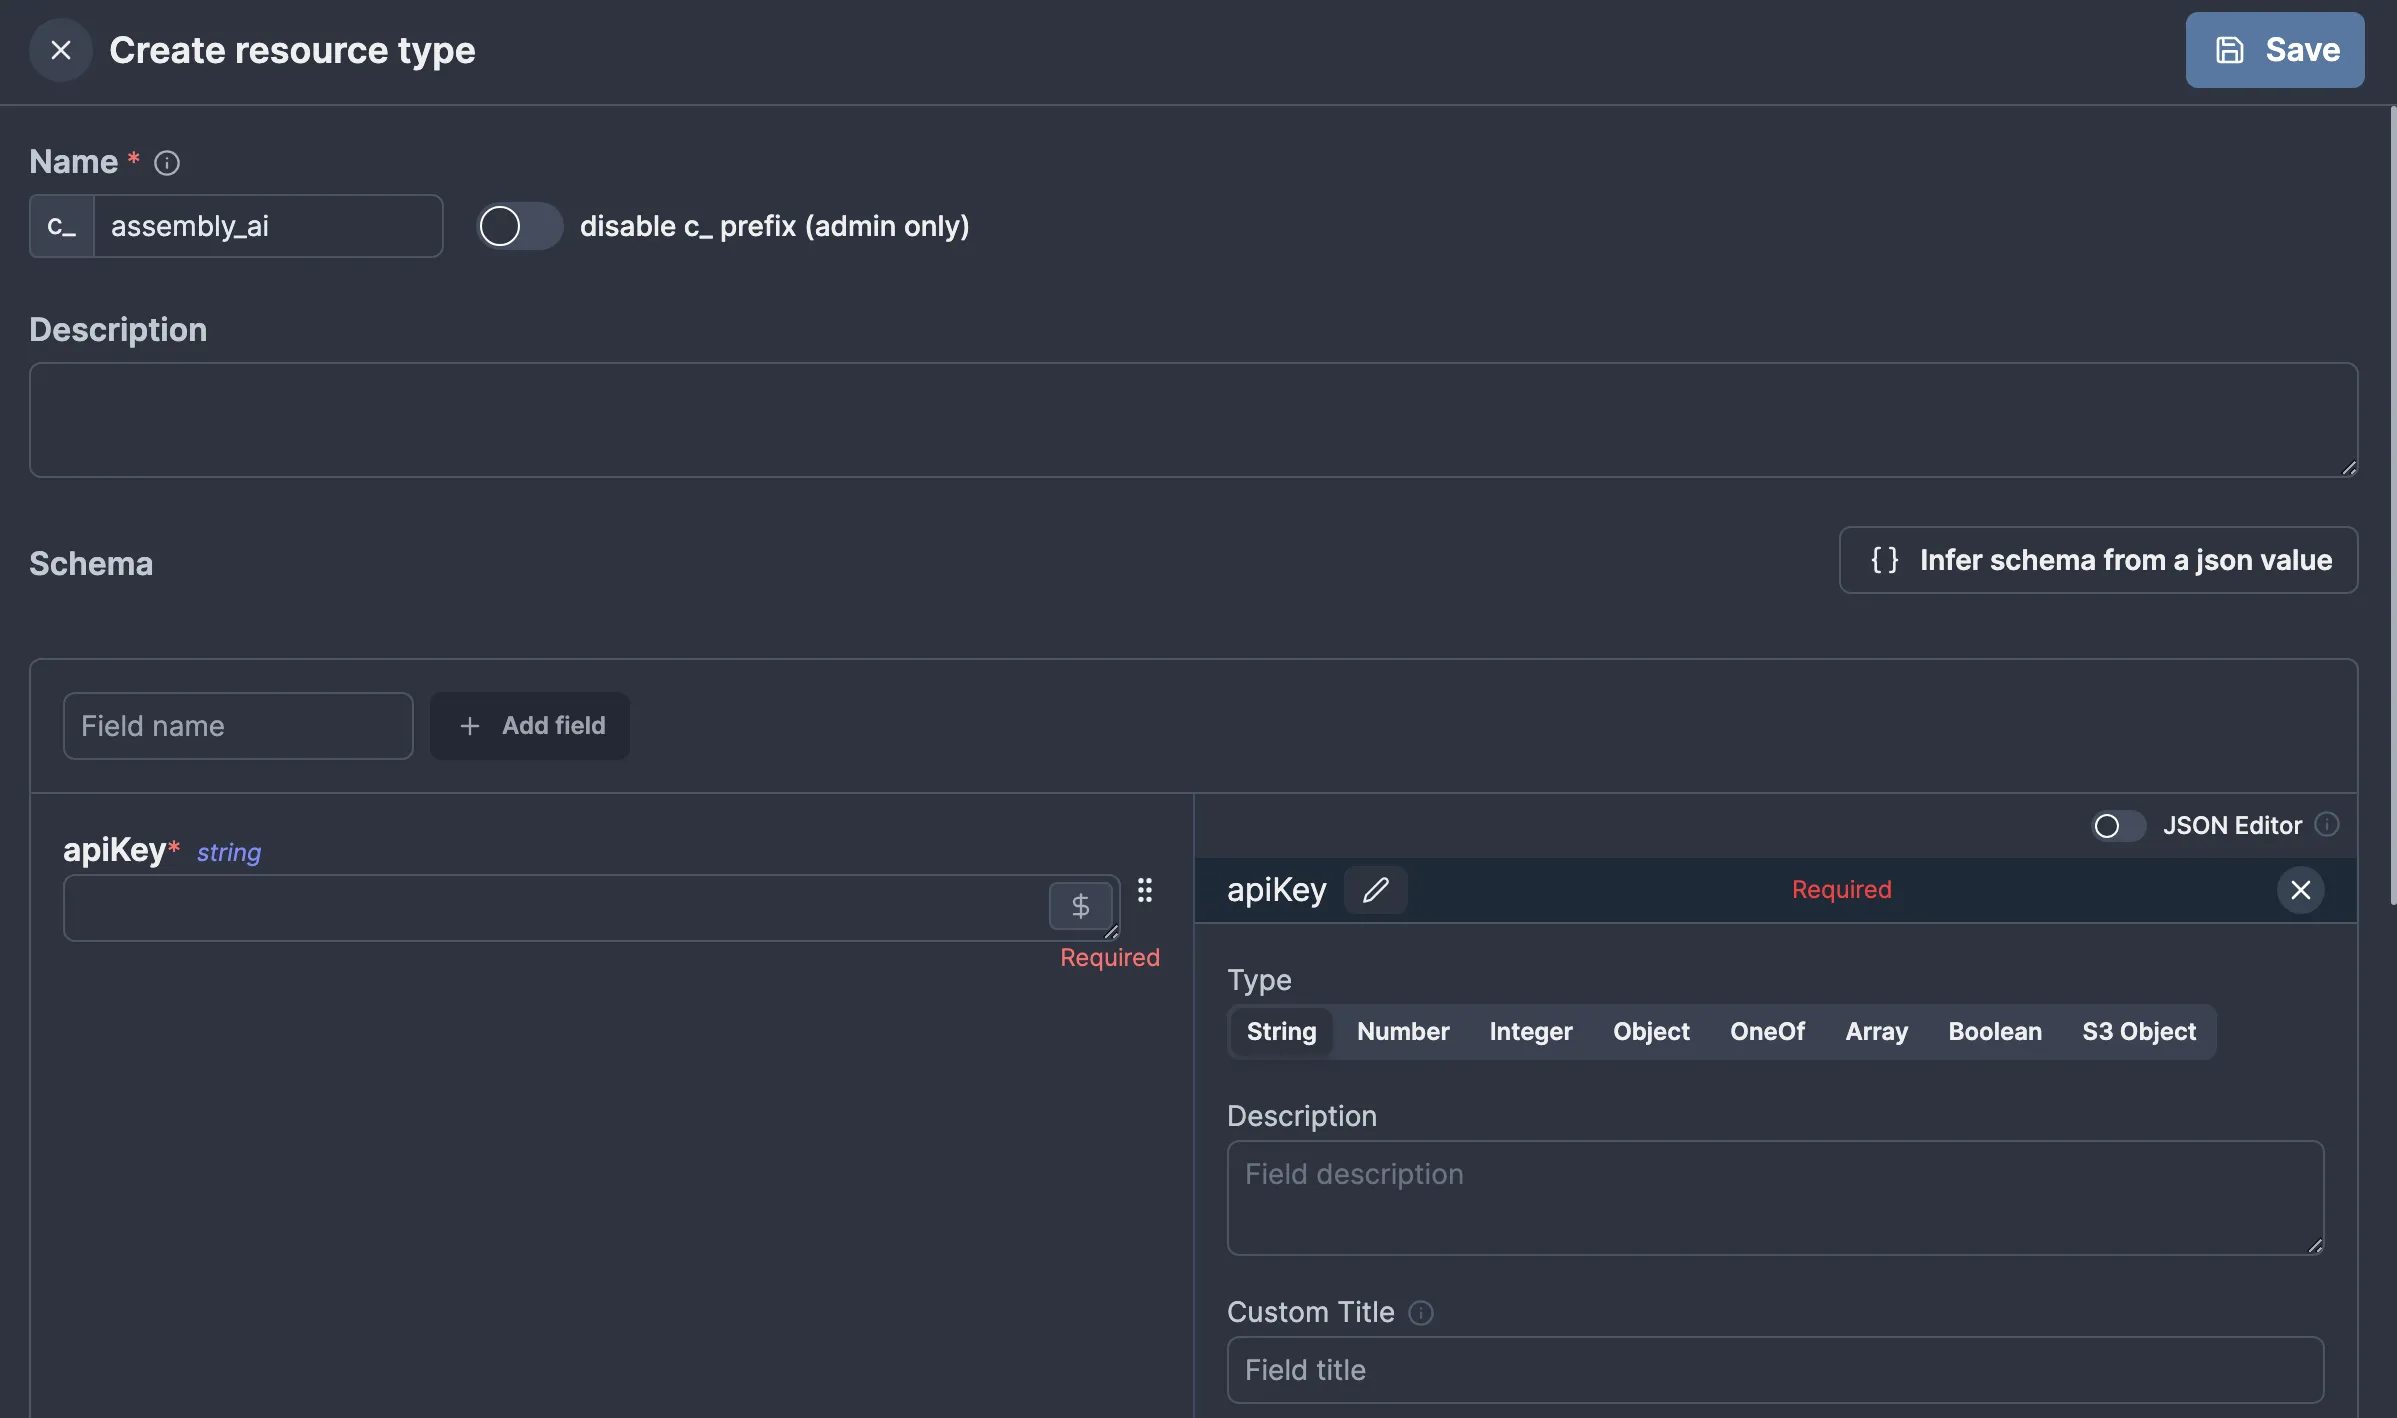
apiKey. Windmill will automatically recognize that apiKey is a secret based on the name, so we don’t need to mark it as such explicitly.
We can now create an AssemblyAI resource with our API key, similar to how we made the S3 resource.
## Creating a transcribe task
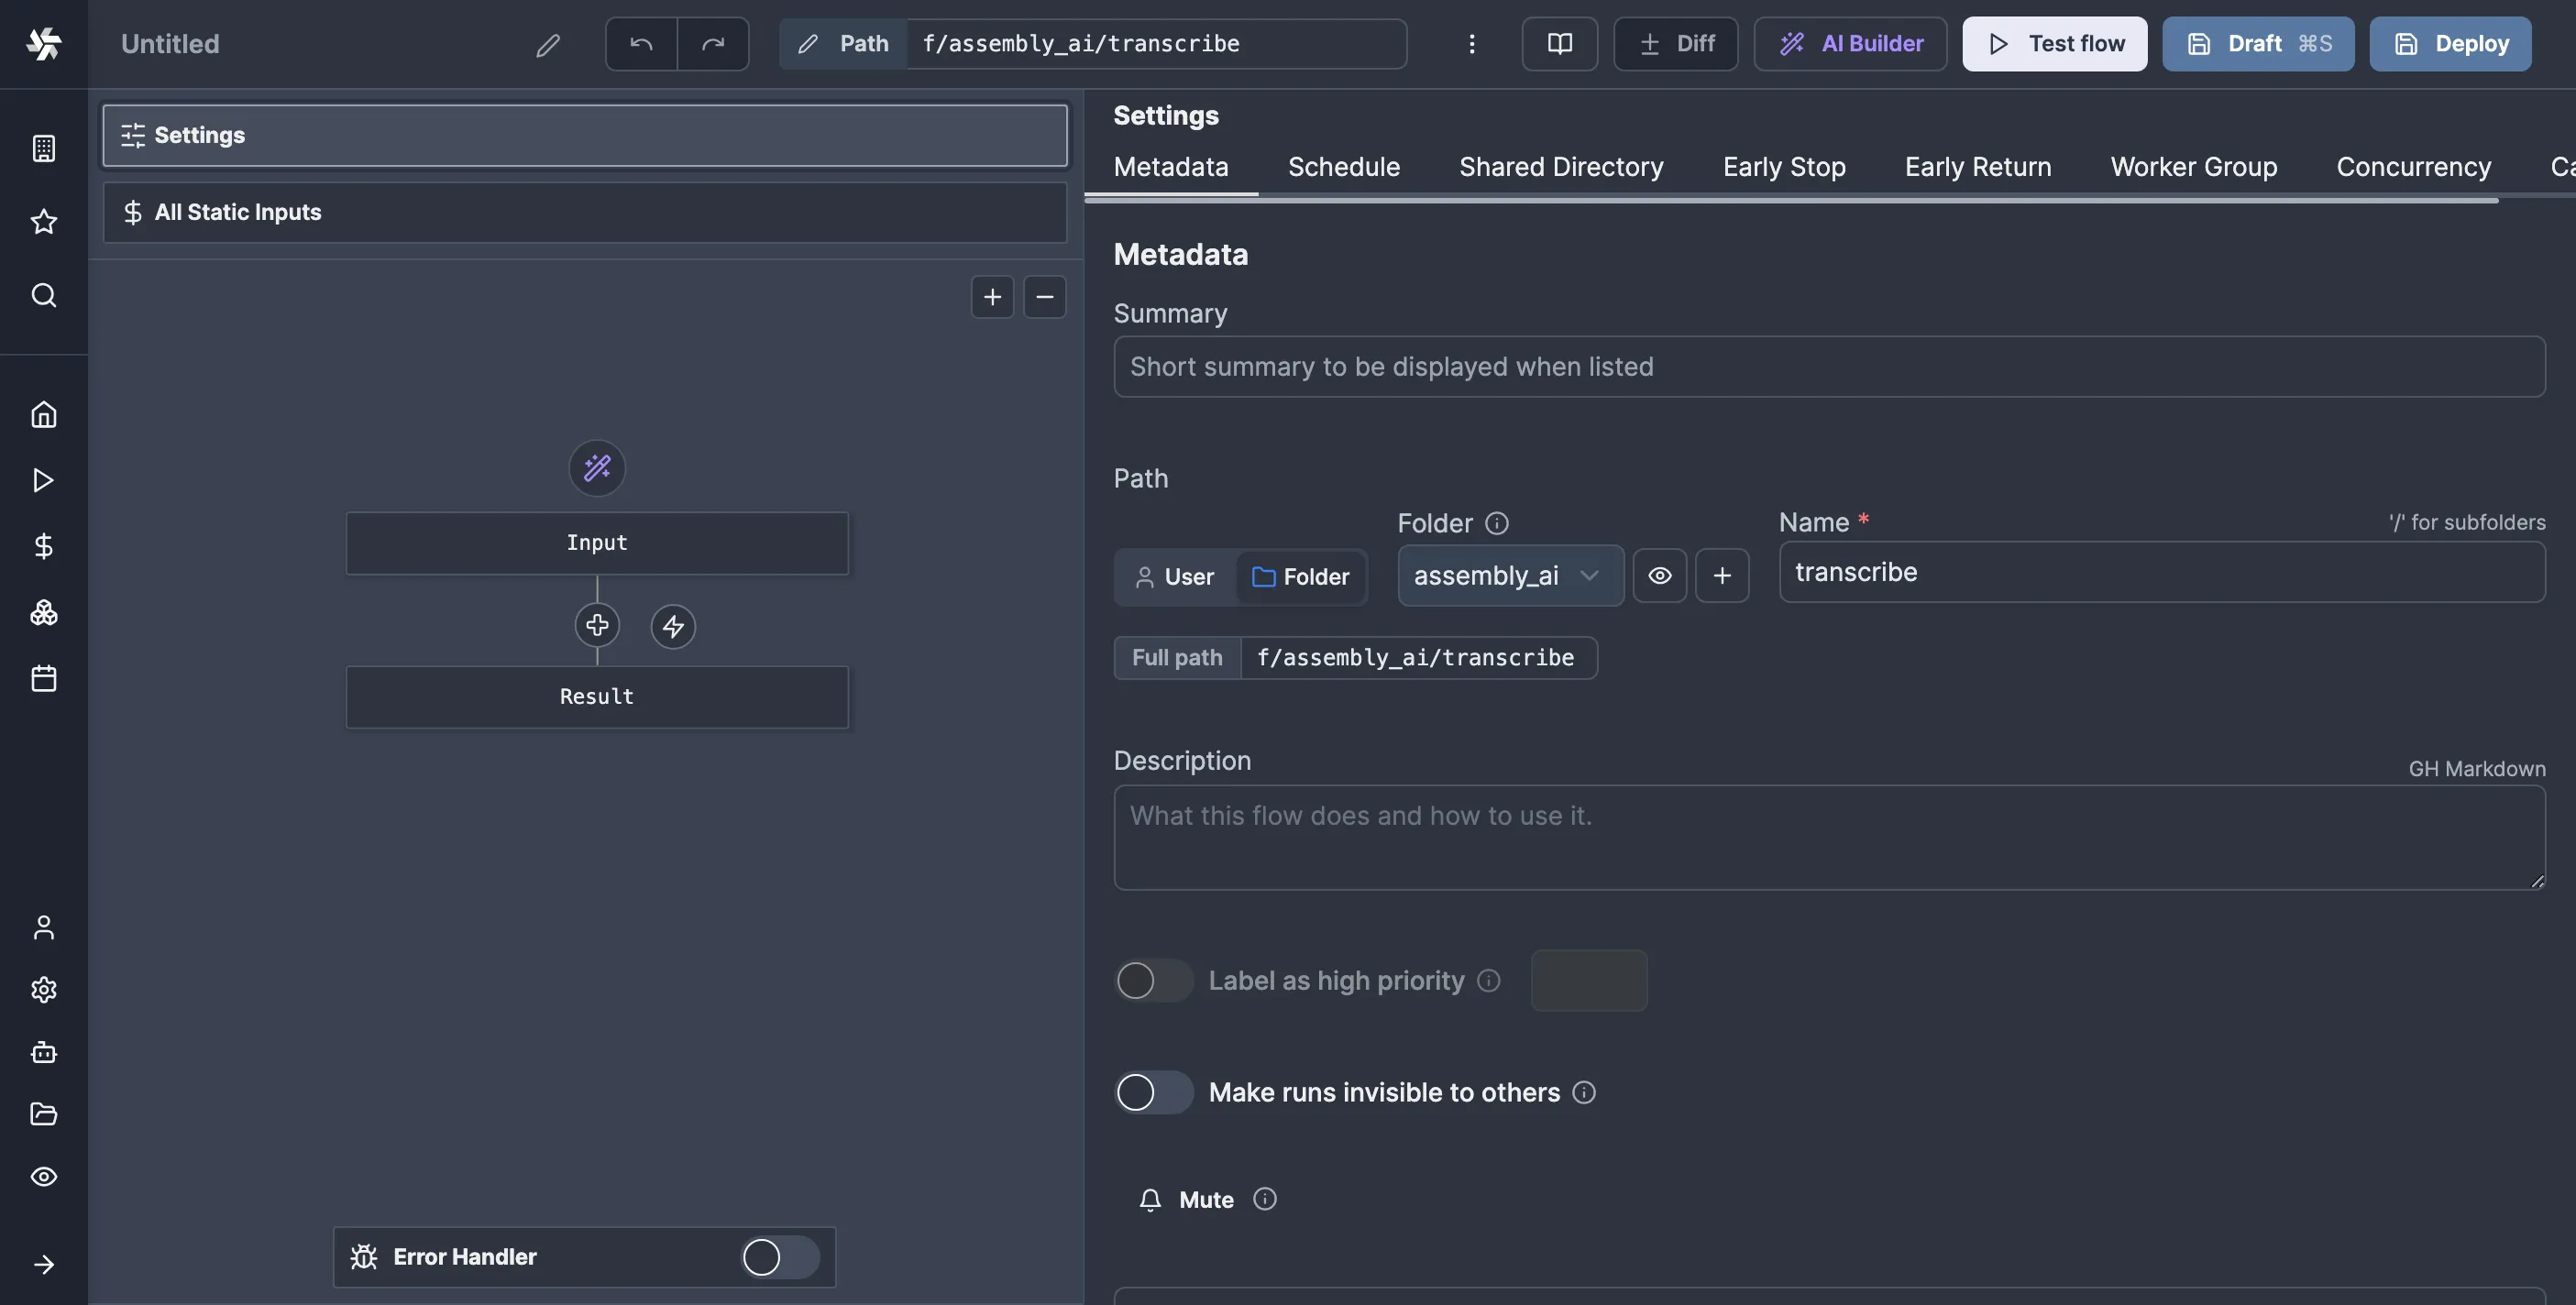
With all the prerequisites out of the way, we are now ready to create our first flow. I will make a folder called “assembly_ai” for mine and call it f/assembly_ai/transcribe. To do this, we’ll go to the Home page and click the “Create Flow” button, then configure the path:
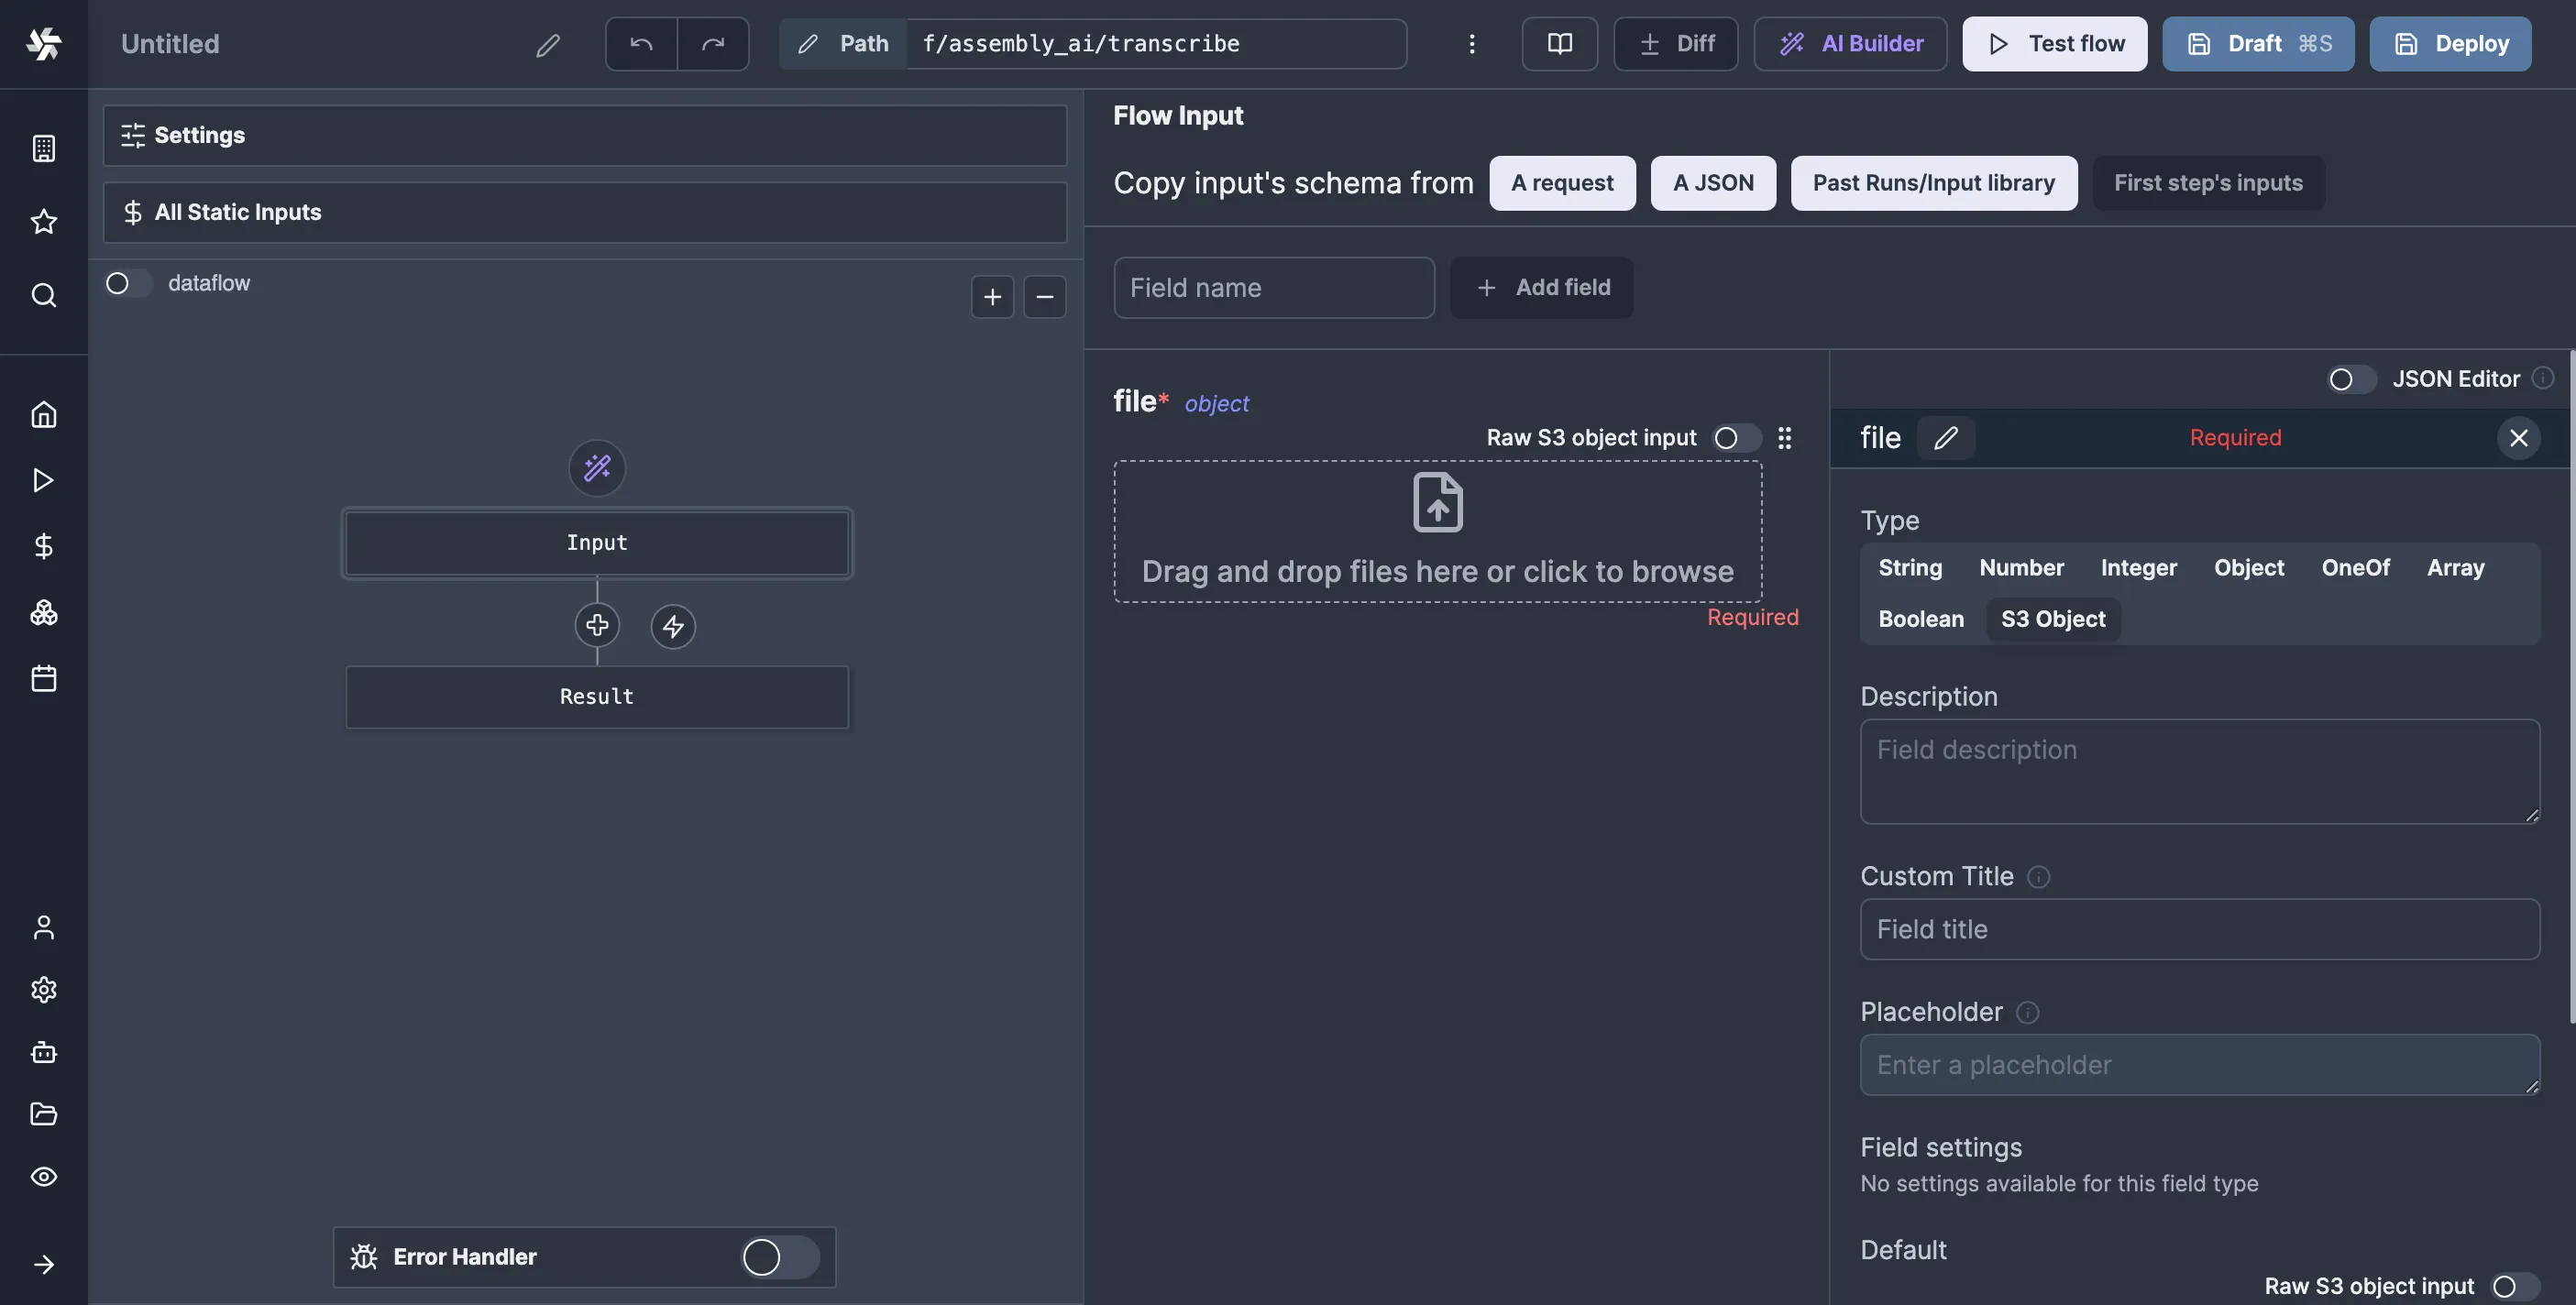
So, click on the “Input” block in the flow editor, then add a new field of type S3 Object and mark it as required. I’ll call mine “file”:
And just like that, we’ve got S3 uploads. It's pretty cool if you ask me.
Now, let’s define our first action script. It will create a pre-signed URL for our file so we can hand it to AssemblyAI for access. I’ll write all my scripts in TypeScript (Bun), but you can write in any supported language.
So, click on the plus button in the flow editor, click “Action,” then select your language of choice. A familiar code editor will greet you:
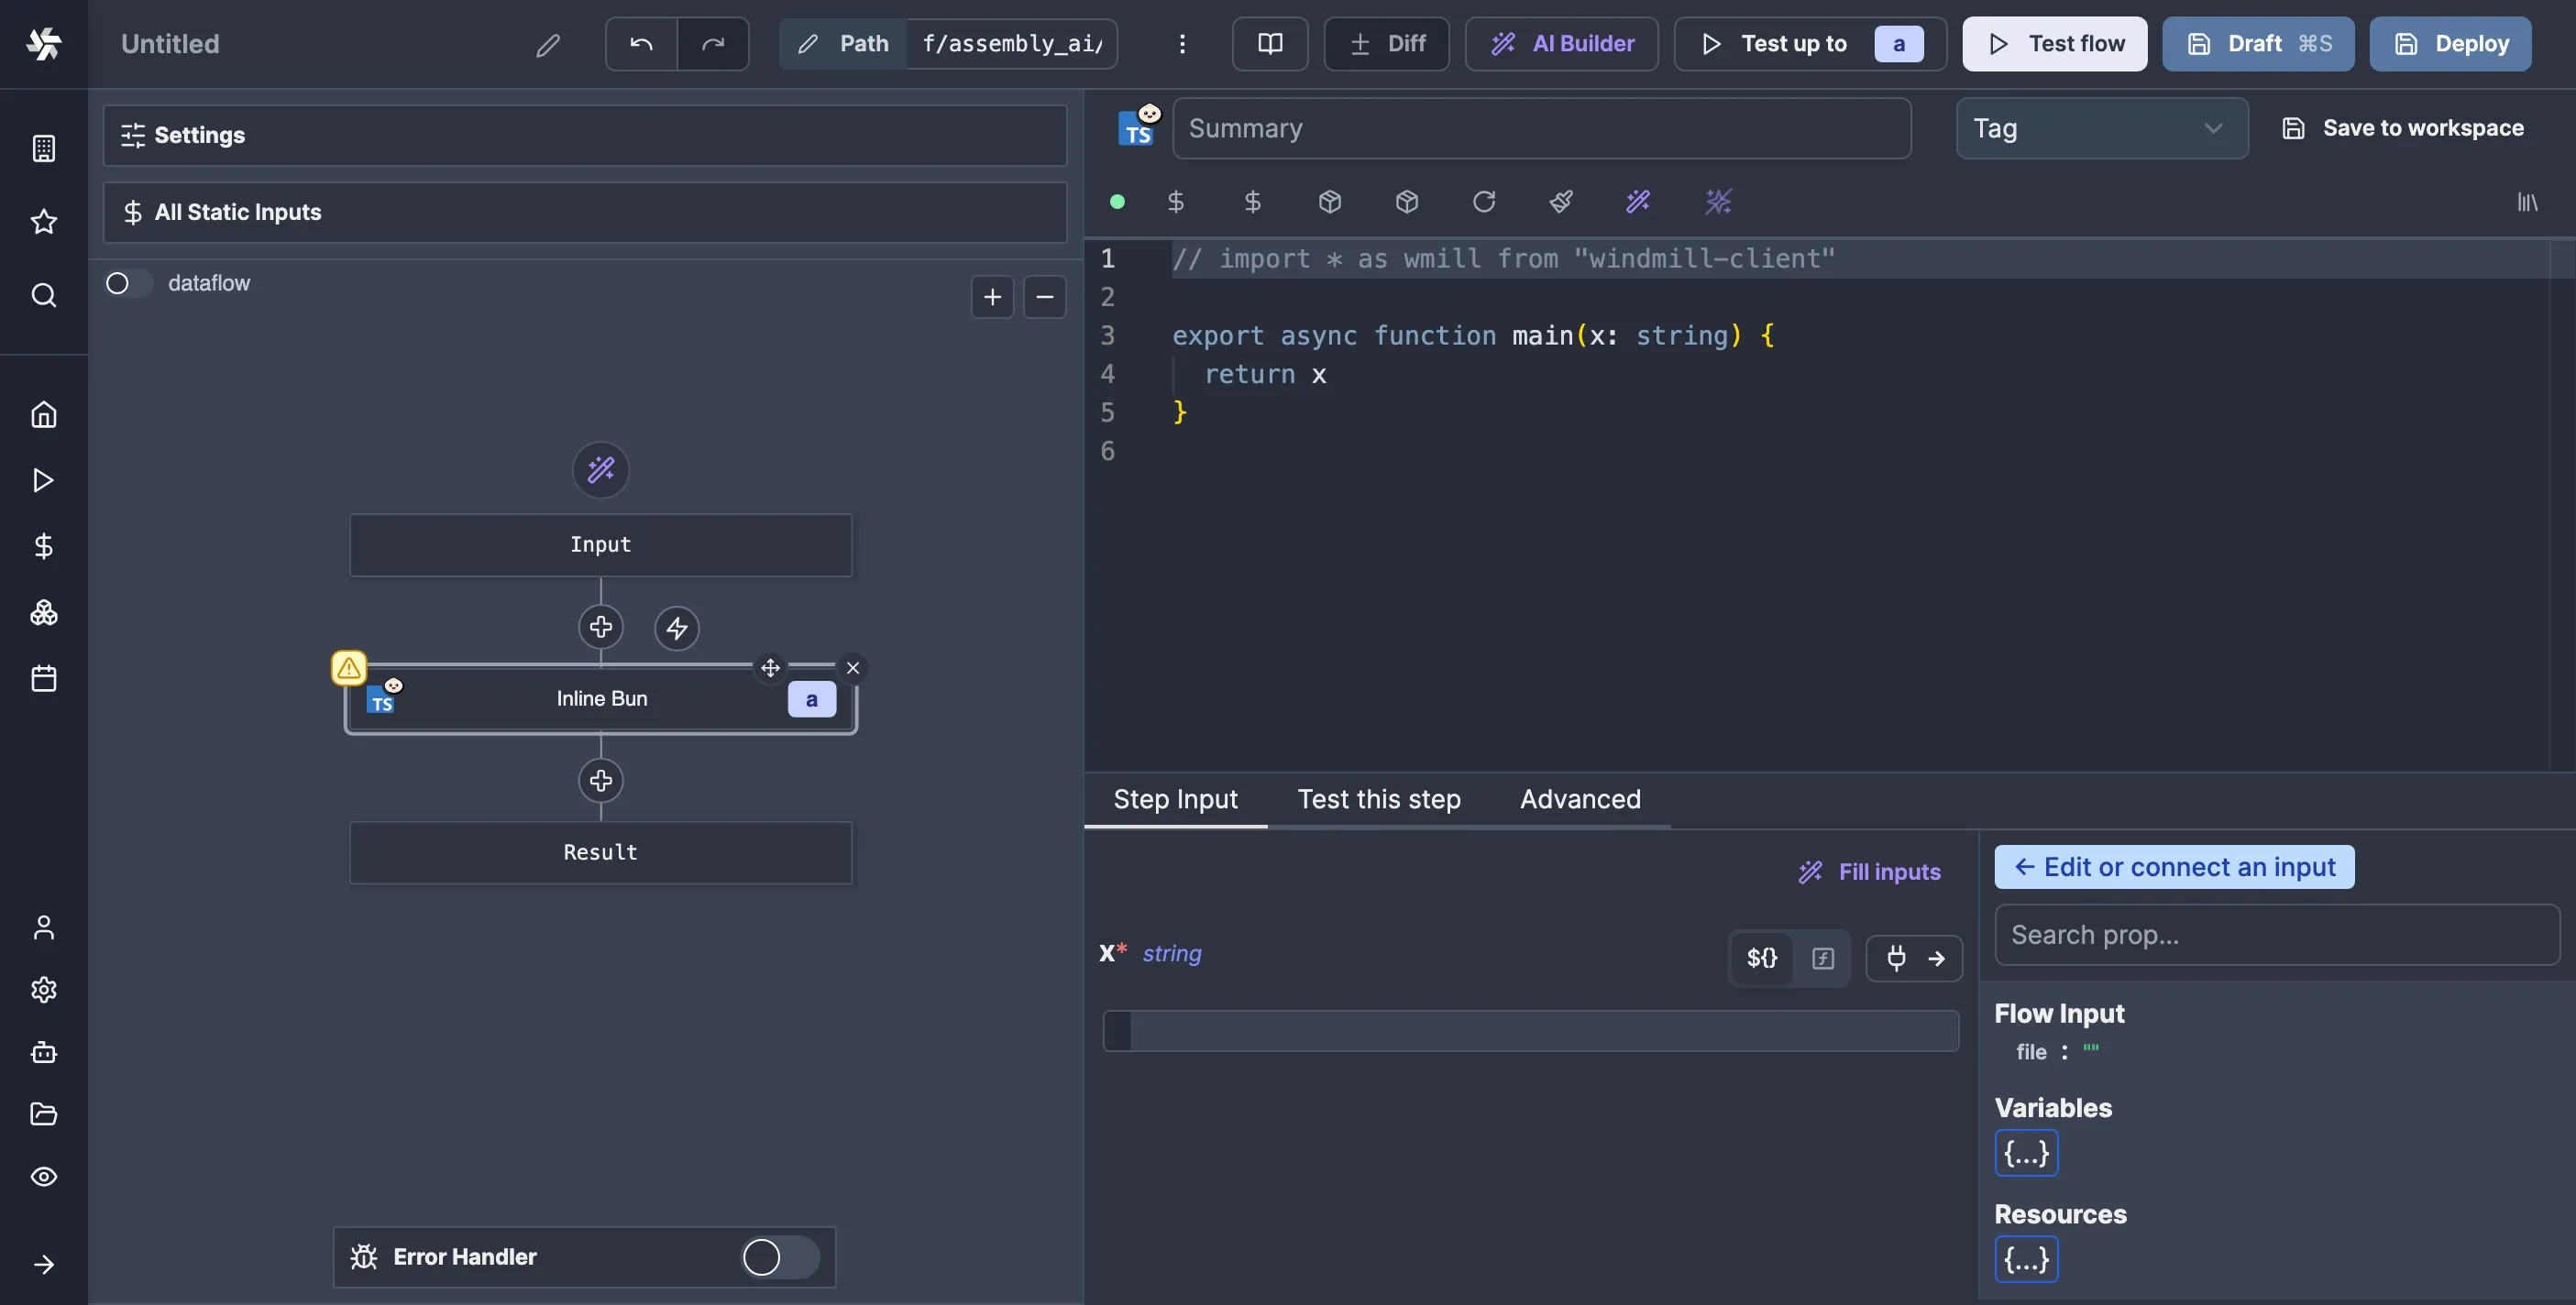
main function to serve as the entry point of your script. Below the code editor, you can specify the script's arguments, which are autogenerated from your code. You can either set arguments to a static value or to a JavaScript expression, in which you can refer to the flow’s inputs or the results from other nodes, for which you get a convenient picker on the side.
This script will take the S3 Object as the input, for which Windmill has a particular type in the corresponding client library for your language of choice. In TypeScript, it’s called wmill.S3Object. We already have a commented-out version of the import for the TypeScript client library, so let’s uncomment it and replace the default x argument with our own. While we’re at it, let’s also add a summary for our script so it shows up nicely in the flow editor:
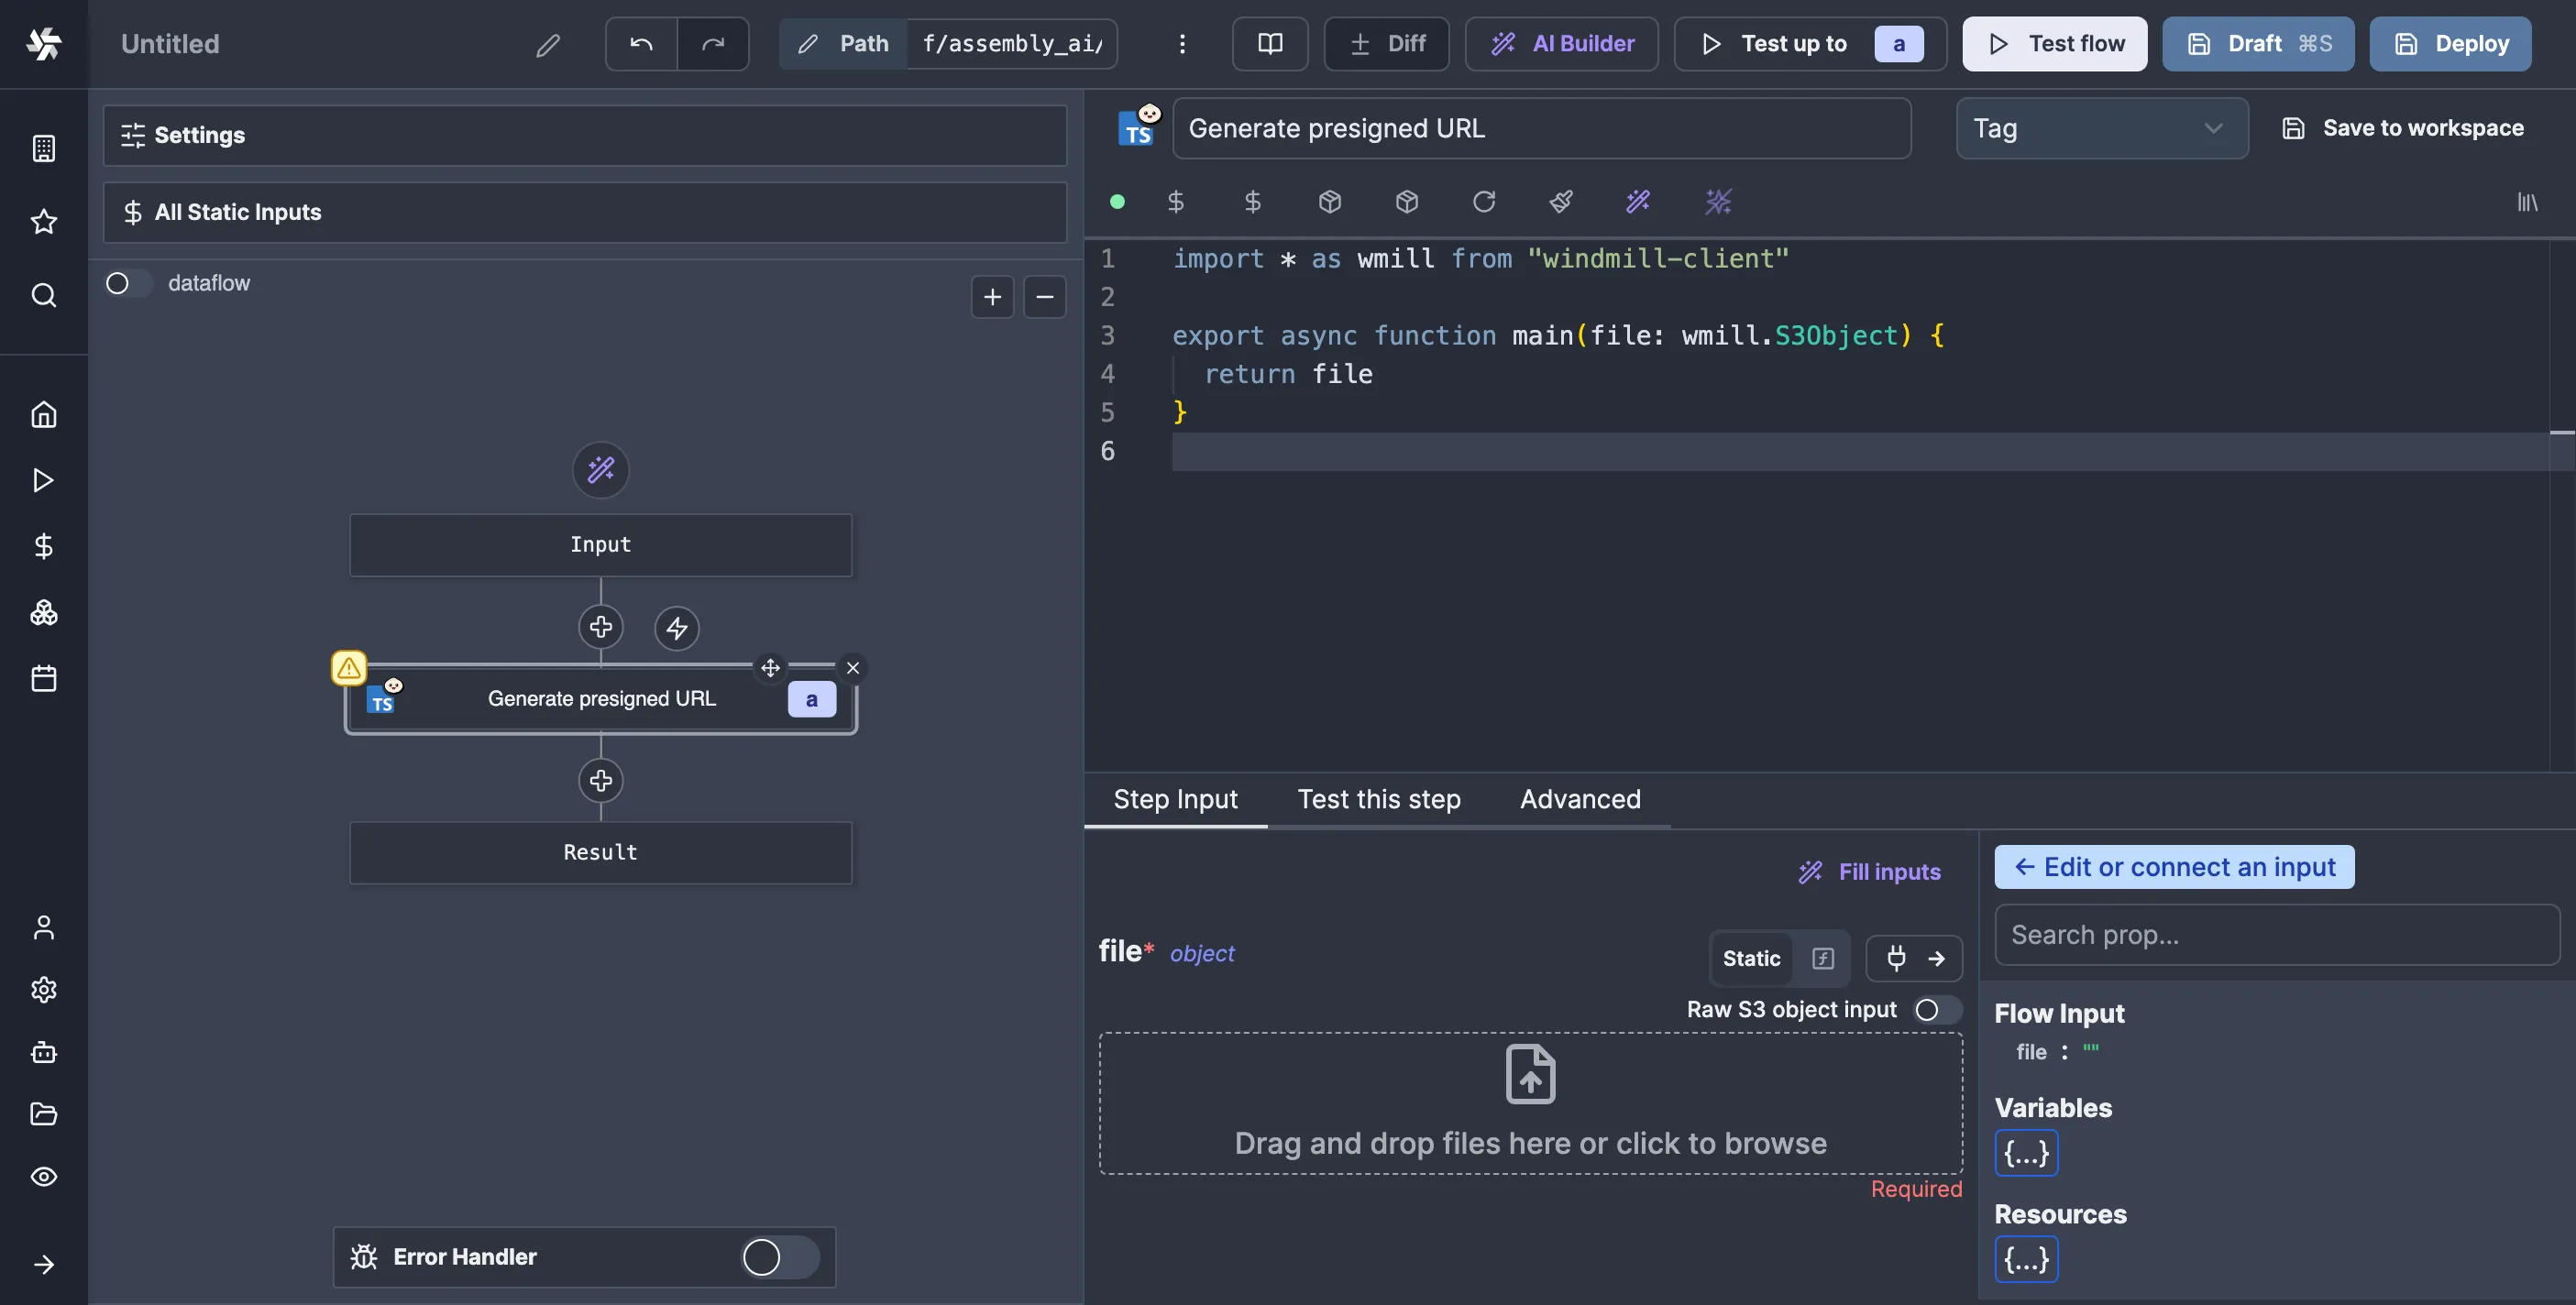
file argument of the script to the file flow input. We can do this by clicking on the “Connect” button (the one with the plug icon) and then clicking on file under “Flow Input”:
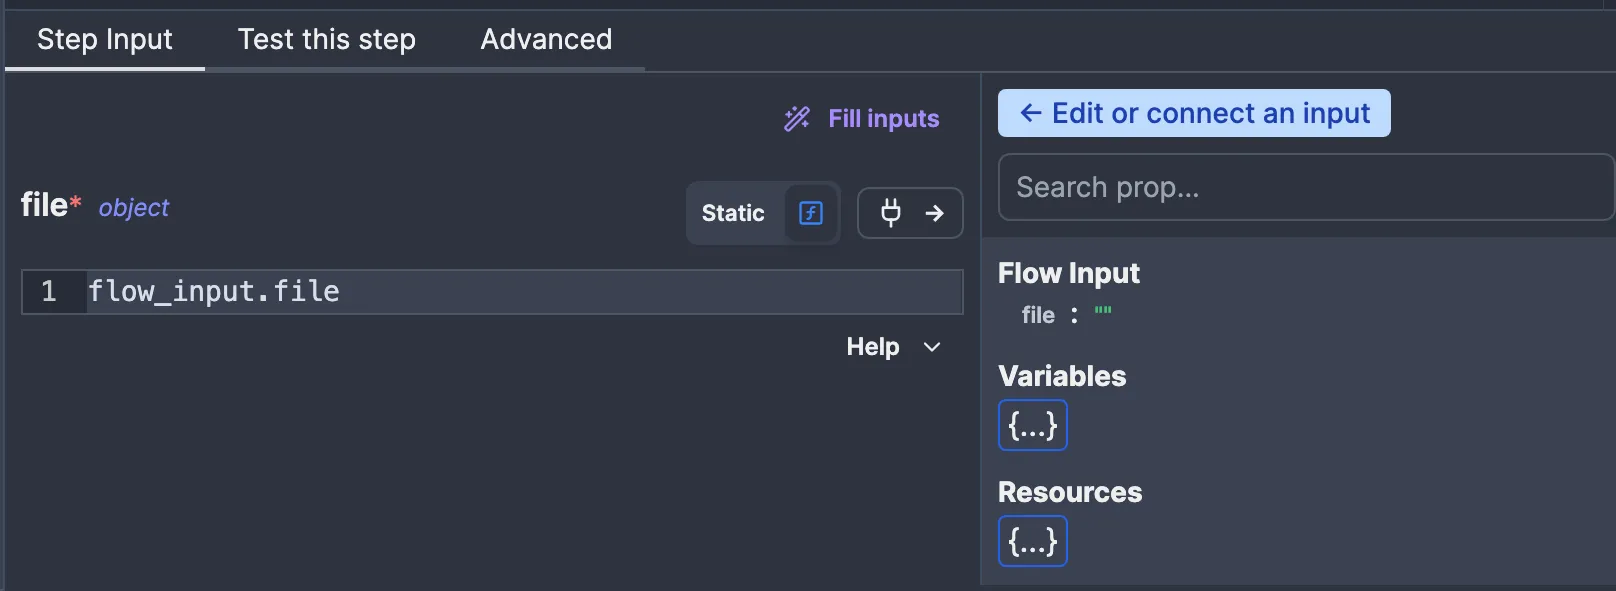
file to a JavaScript expression that refers to the corresponding value, in this case flow_input.file. Now, our script has access to the S3 object. Let’s test it to see what happens.
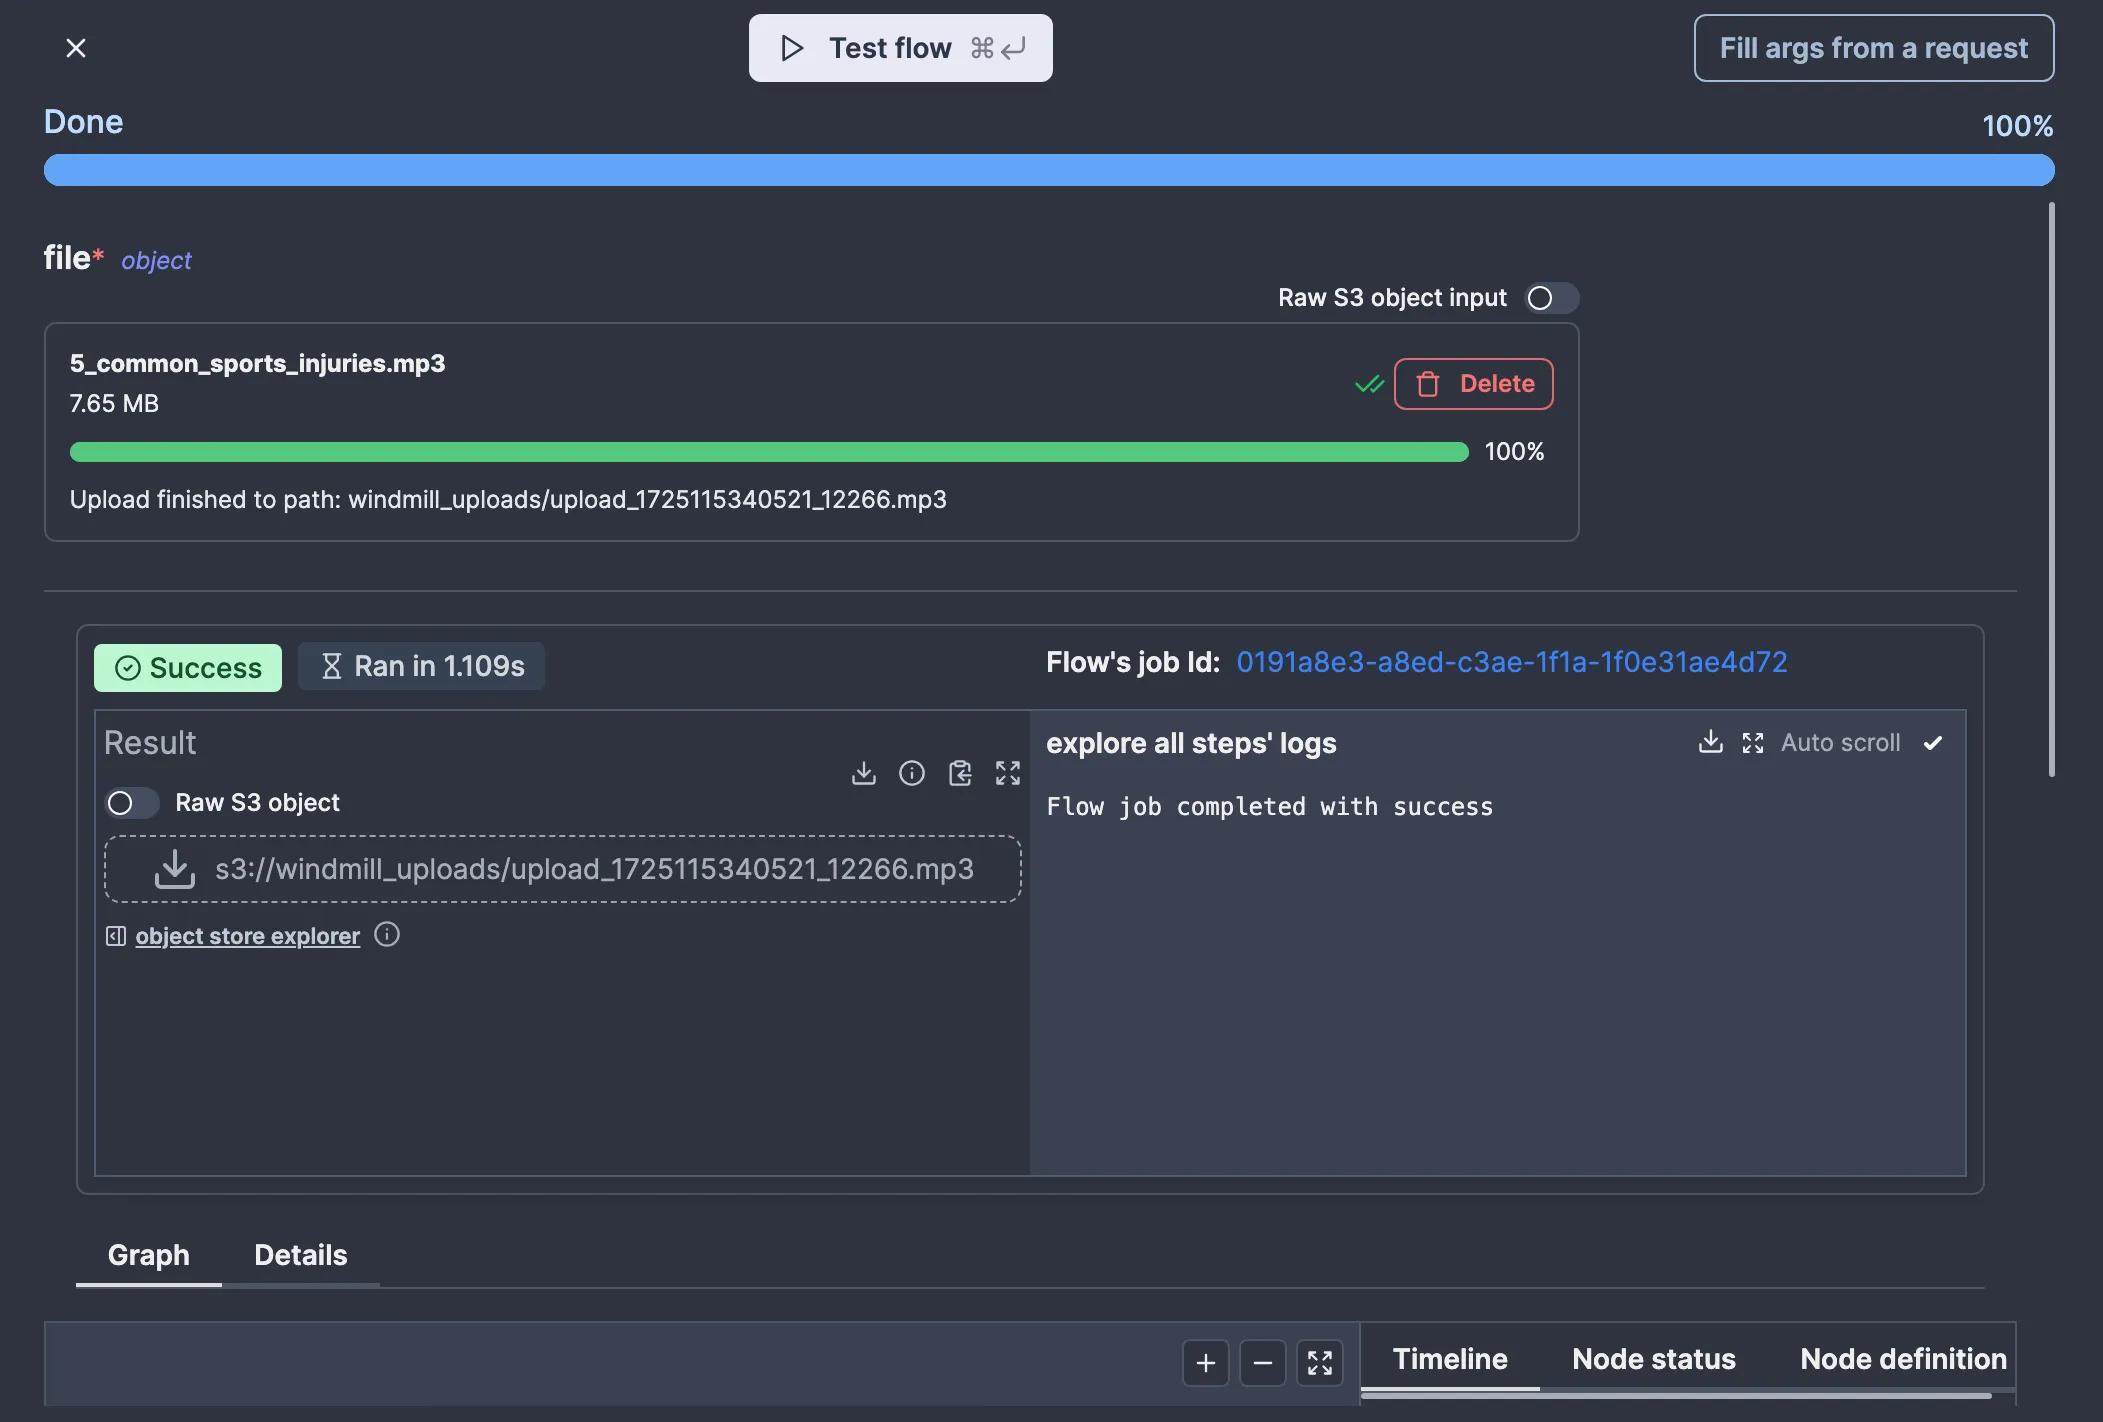
Windmill allows you to test flows as you’re editing them. You can also test a flow up to some node only, which is helpful if you want to test some specific part of your flow. We’ll be testing the whole flow (which is only one node right now either way), so let’s click “Test flow.” I will use this audio file for testing, as it is listed in the AssemblyAI documentation.
So, drag and drop the file on the input and click “Test flow.” You should see something like this:
To generate a pre-signed URL for our file, we’ll need to create an S3 client. Since we need the configuration to make an S3 client, we’ll make our script take the S3 resource we created earlier as an argument.
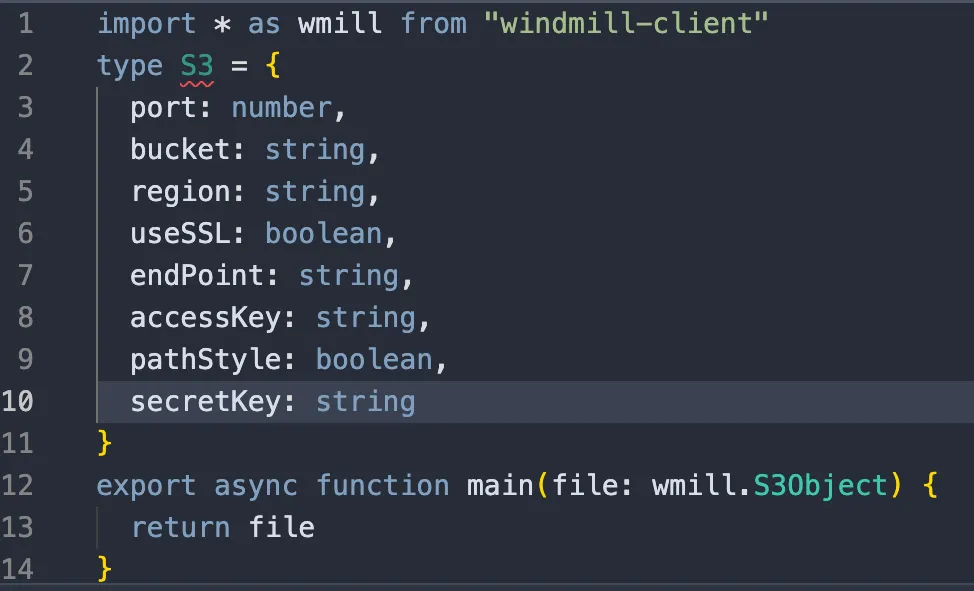
To take a resource as an argument in a script, one must define a type named after the corresponding resource type. Thankfully, Windmill can do that for you: click on the “Add resource type” button located above the code editor (which confusingly looks the same as the “Add resource” button on my tiny screen as they have the same icon), then click on “s3”.
A new type called S3 should appear:
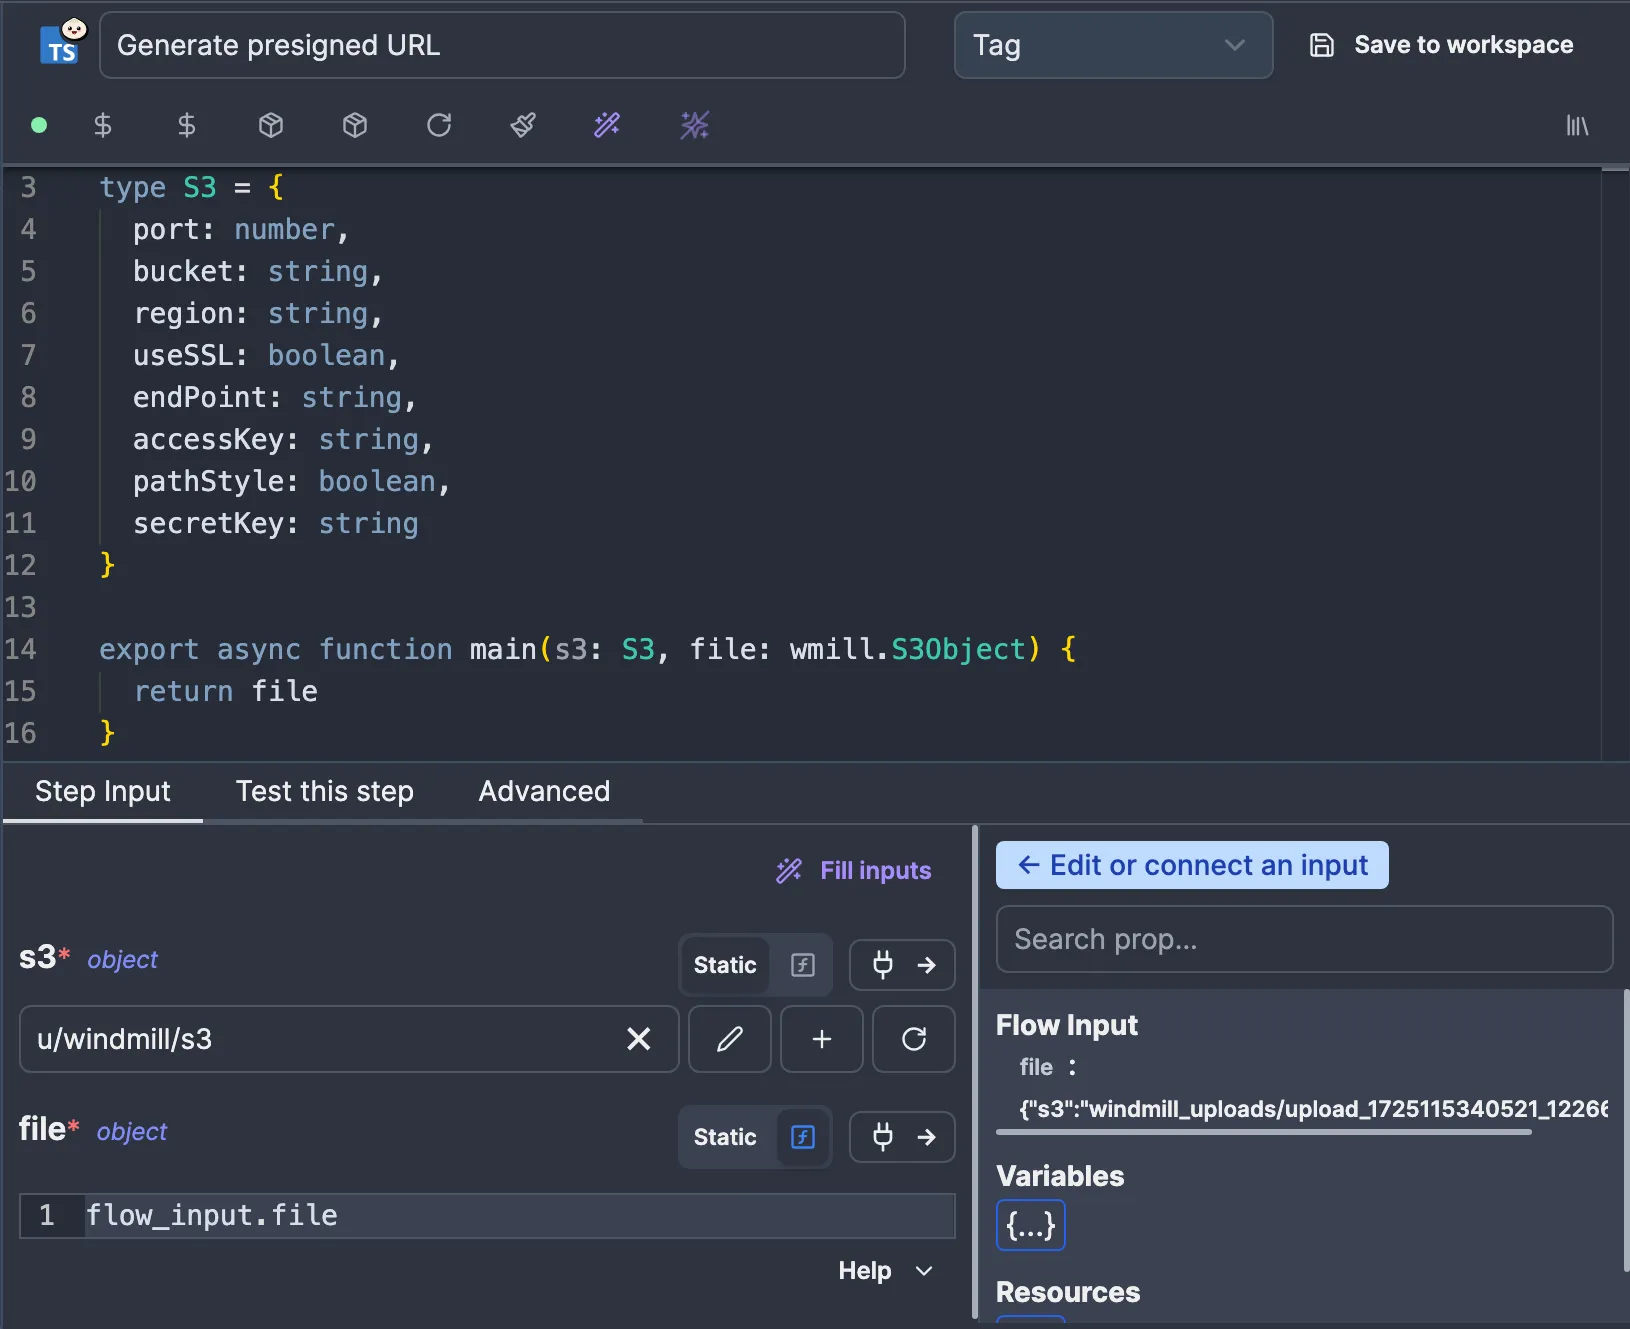
import * as wmill from "windmill-client" import { S3Client, GetObjectCommand } from "@aws-sdk/client-s3"; import { getSignedUrl } from "@aws-sdk/s3-request-presigner"; type S3 = { port: number, bucket: string, region: string, useSSL: boolean, endPoint: string, accessKey: string, pathStyle: boolean, secretKey: string } export async function main(s3: S3, file: wmill.S3Object) { const objectKey = file.s3; const port = s3.port ?? (s3.useSSL ? '443' : '80'); const client = new S3Client({ region: s3.region, endpoint: `${s3.useSSL ? 'https' : 'http'}://${s3.endPoint}:${port}`, credentials: { accessKeyId: s3.accessKey, secretAccessKey: s3.secretKey, }, forcePathStyle: s3.pathStyle, }); const command = new GetObjectCommand({ Bucket: s3.bucket, Key: objectKey, }); return getSignedUrl(client, command, { expiresIn: 3600 }); }
Now, if we test our flow again, we get a pre-signed URL for our file:

We’re now ready to give this URL to AssemblyAI, so let’s create a new action script. If you’ve been following, you should be able to get there yourself quite quickly:
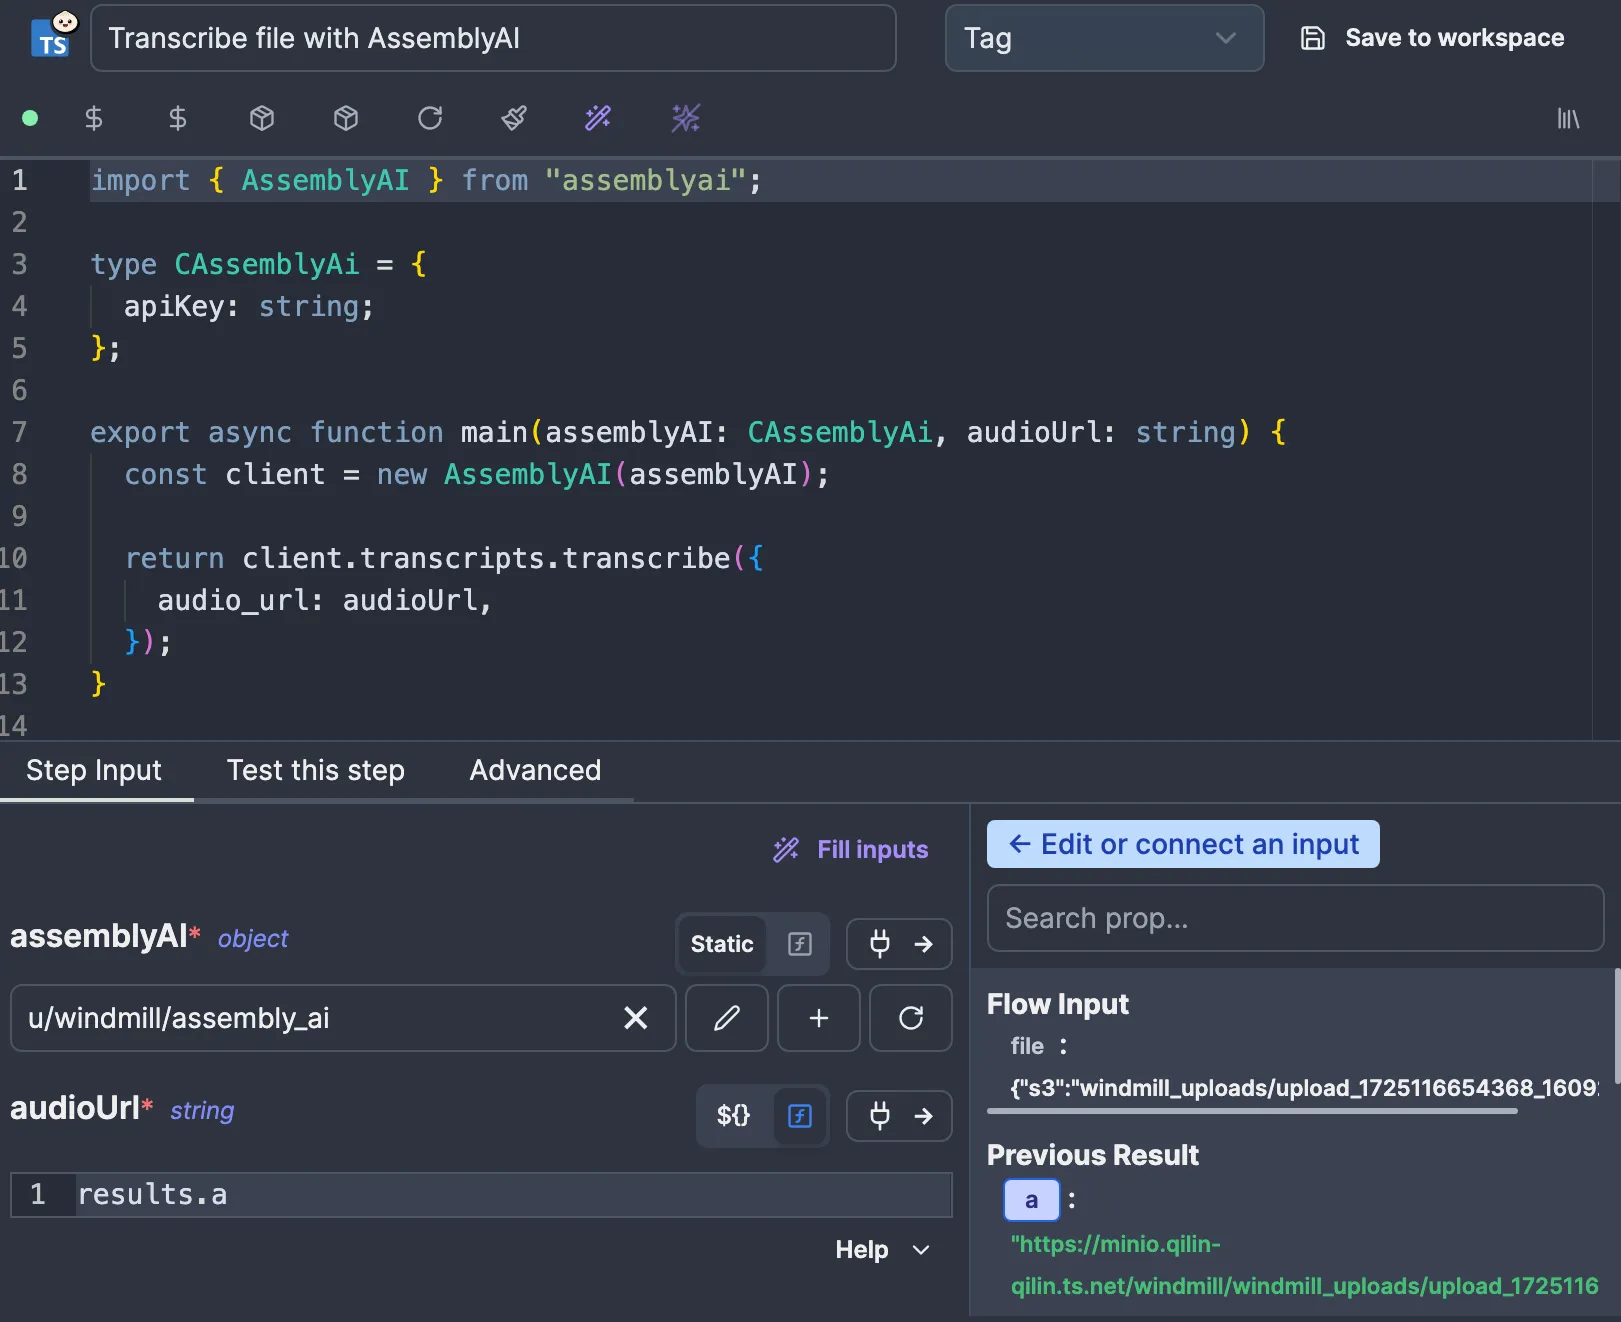
c_assembly_ai resource and the audioUrl, which is connected to the result of the previous node. The script uses the AssemblyAI SDK to run and await the subscription, nothing special.
If you test the flow now, you should see something like this:
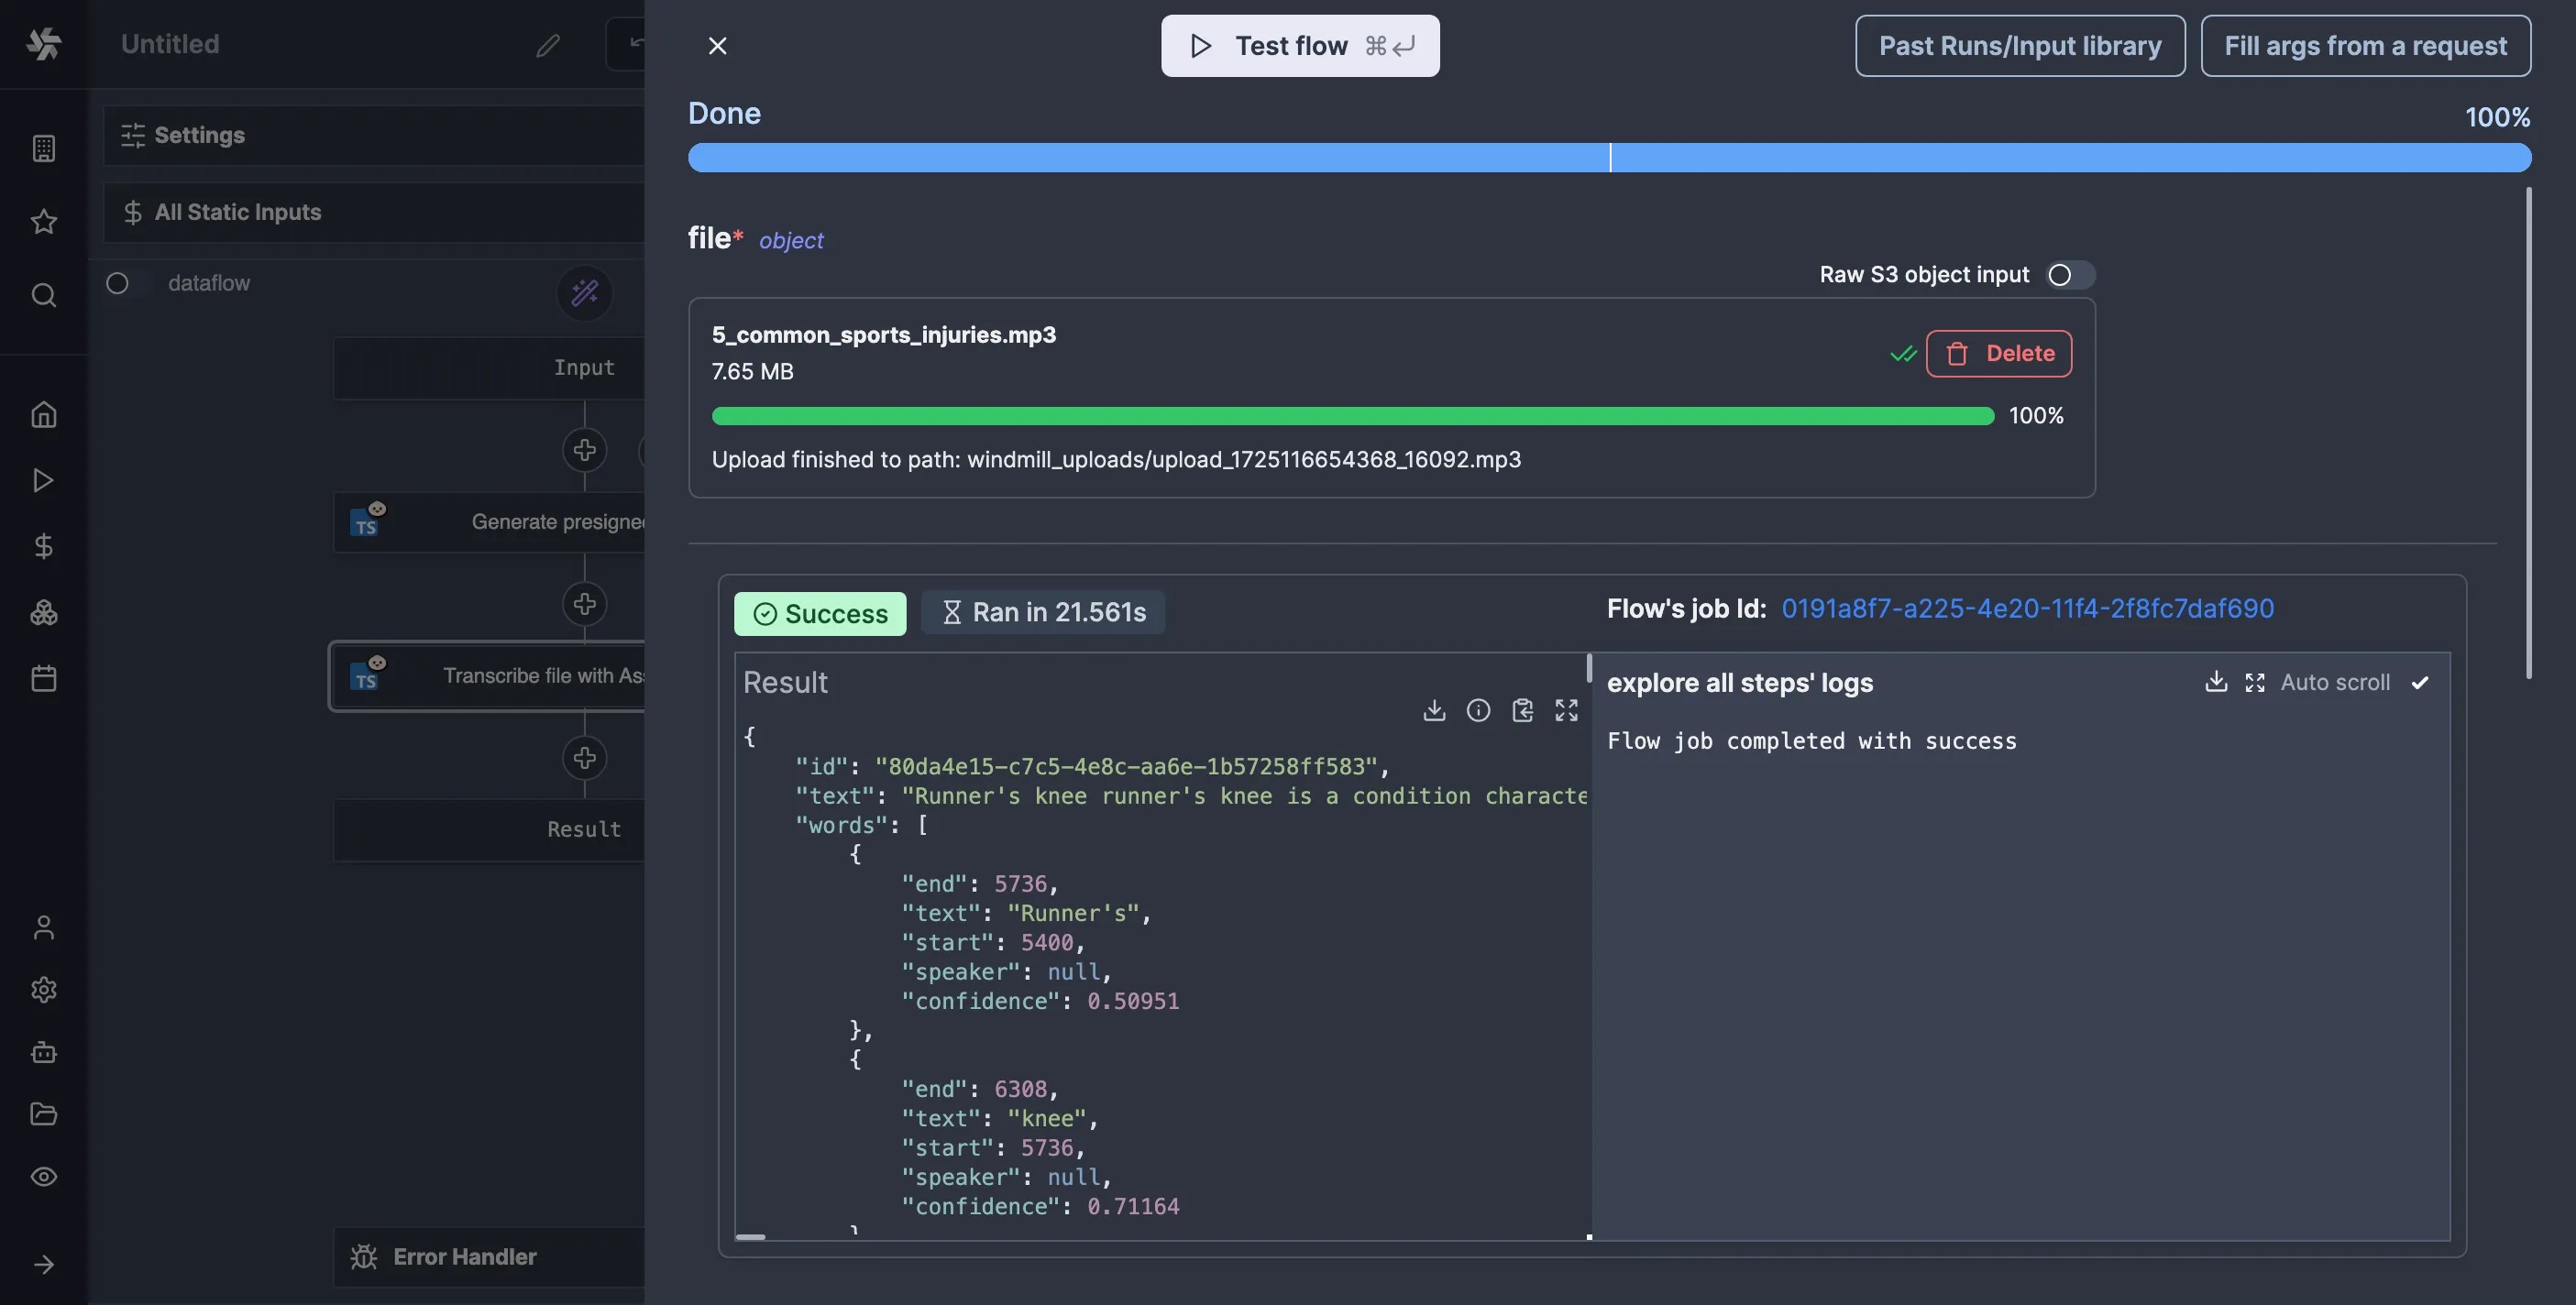
Boom, we have a transcription. But at what cost?
We spent 113 seconds waiting for the result. That is 113 seconds too much.
What is happening is the AssemblyAI SDK is polling for the result, keeping the worker busy until the job is completed. This is “bad” because Windmill’s architecture is worker-based, and each worker can only execute one job at a time. All this polling is hogging the worker, preventing it from doing anything else, which isn’t ideal.
## Webhooks to the rescue
Thankfully, we can do better. AssemblyAI allows you to pass a webhook URL to receive the results. This would enable us to free up the worker so that it can run other jobs.
Let’s make a separate flow to be our webhook handler. So, let’s click “Deploy” on this flow, then go and create a new flow. I’ll call mine f/assembly_ai/webhook. Since we’re unsure what AssemblyAI will send to our webhook (and we’re too lazy to read the documentation), let’s leave it empty for now and deploy it.
To get a URL that triggers the flow, we need to go to the “Details & Triggers” tab:
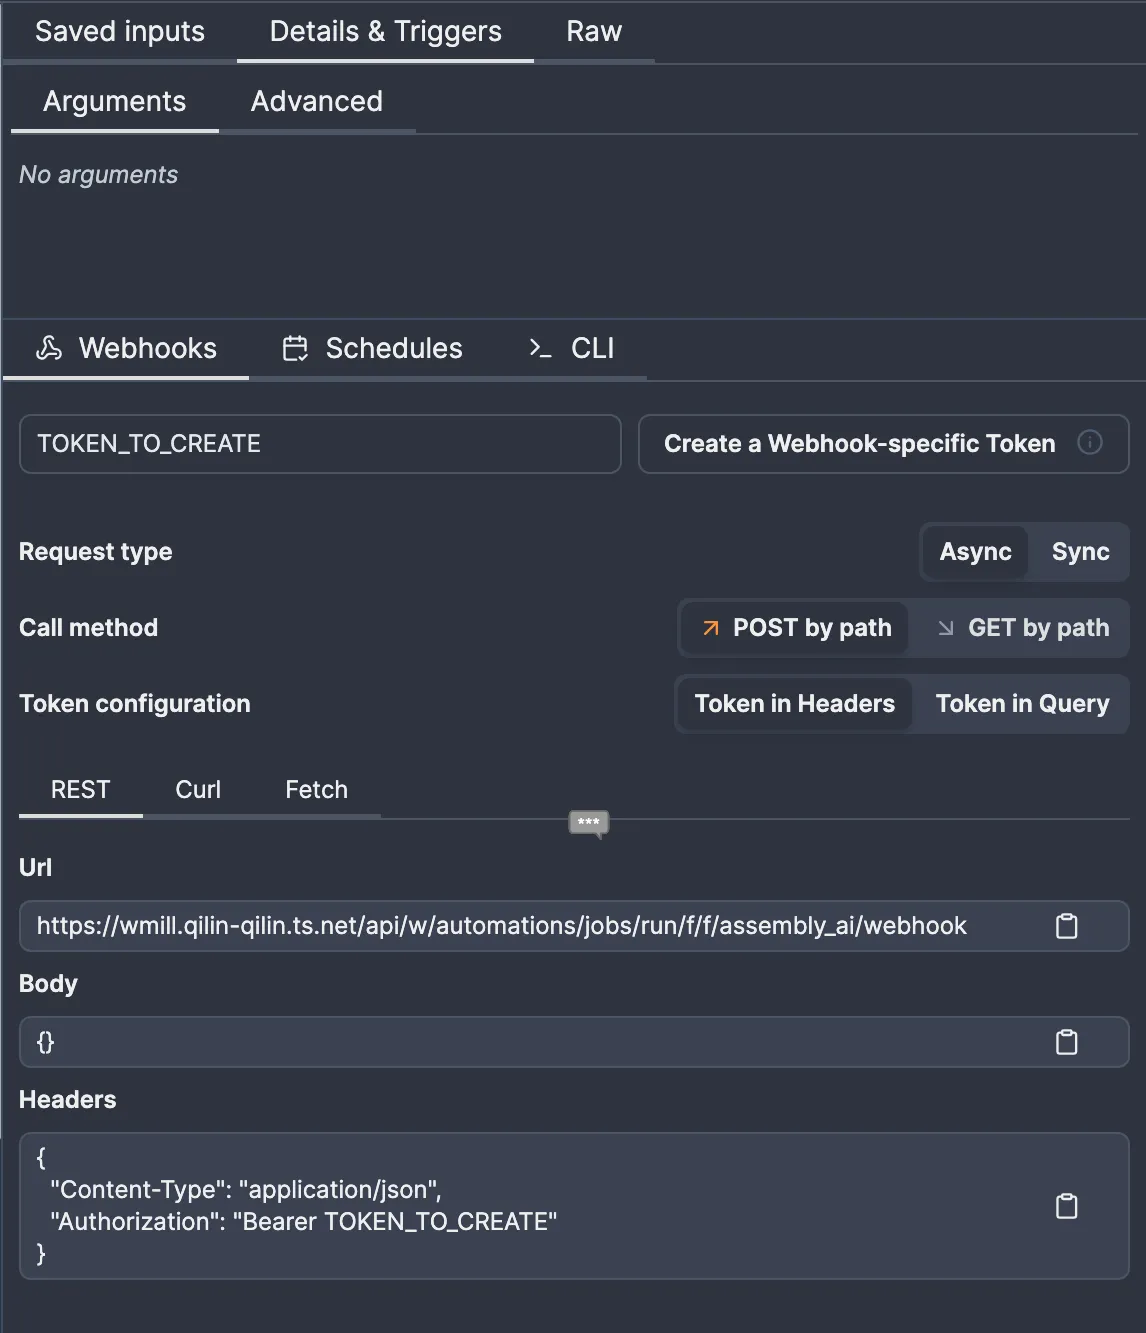
Once you create the token, note the URL and token somewhere. We’ll need to store them somewhere to retrieve them in the script. I like the idea of storing them in a resource, so I’ll make a c_webhook resource type as shown, then make a f/assembly_ai/webhook resource:

import { AssemblyAI } from "assemblyai"; type CAssemblyAi = { apiKey: string; }; type CWebhook = { url: string; token: string; }; export async function main( assemblyAI: CAssemblyAi, webhook: CWebhook, audioUrl: string, ) { const client = new AssemblyAI(assemblyAI); return client.transcripts.submit({ audio_url: audioUrl, webhook_url: webhook.url, webhook_auth_header_name: "Authorization", webhook_auth_header_value: `Bearer ${webhook.token}`, }); }
Again, we only have one c_webhook resource, so Windmill will select it for us. Note that for any of this to make sense, we need to use the submit method instead of the transcribe method, as the latter polls until the task is done.
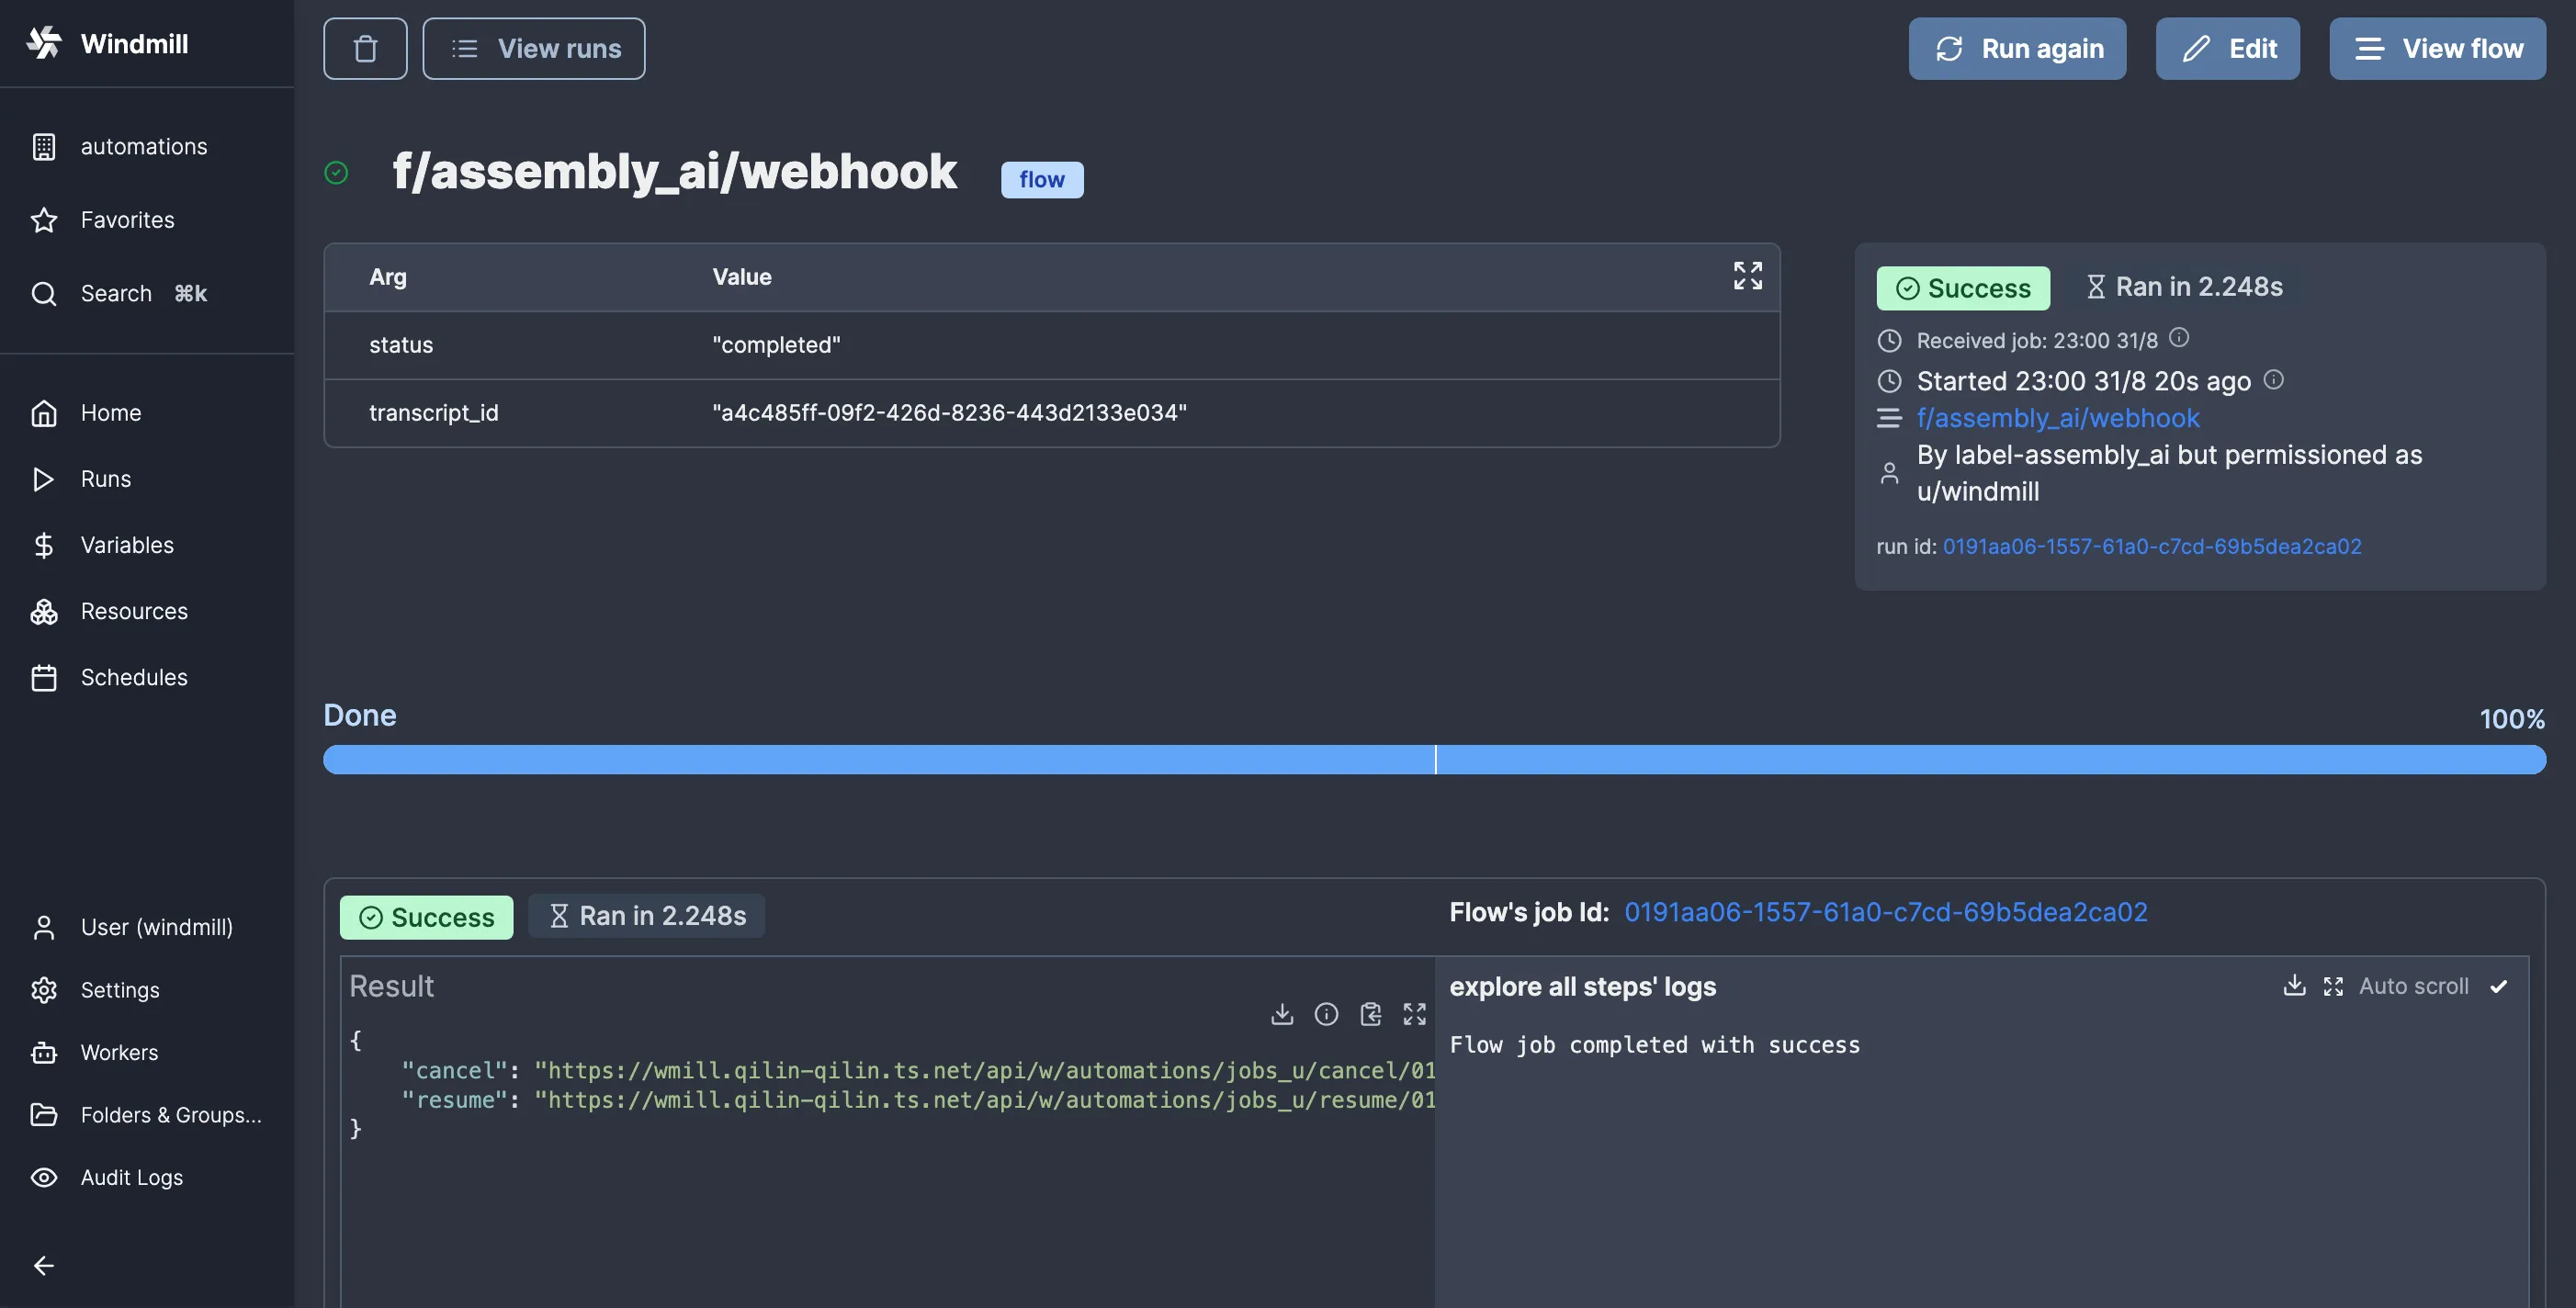
Okay, so let’s test the flow and see if our webhook flow runs:


For the next magic trick, let’s return to the webhook flow. If we click on the “Input” node in the flow editor, we have the option to copy the input schema from a past run:


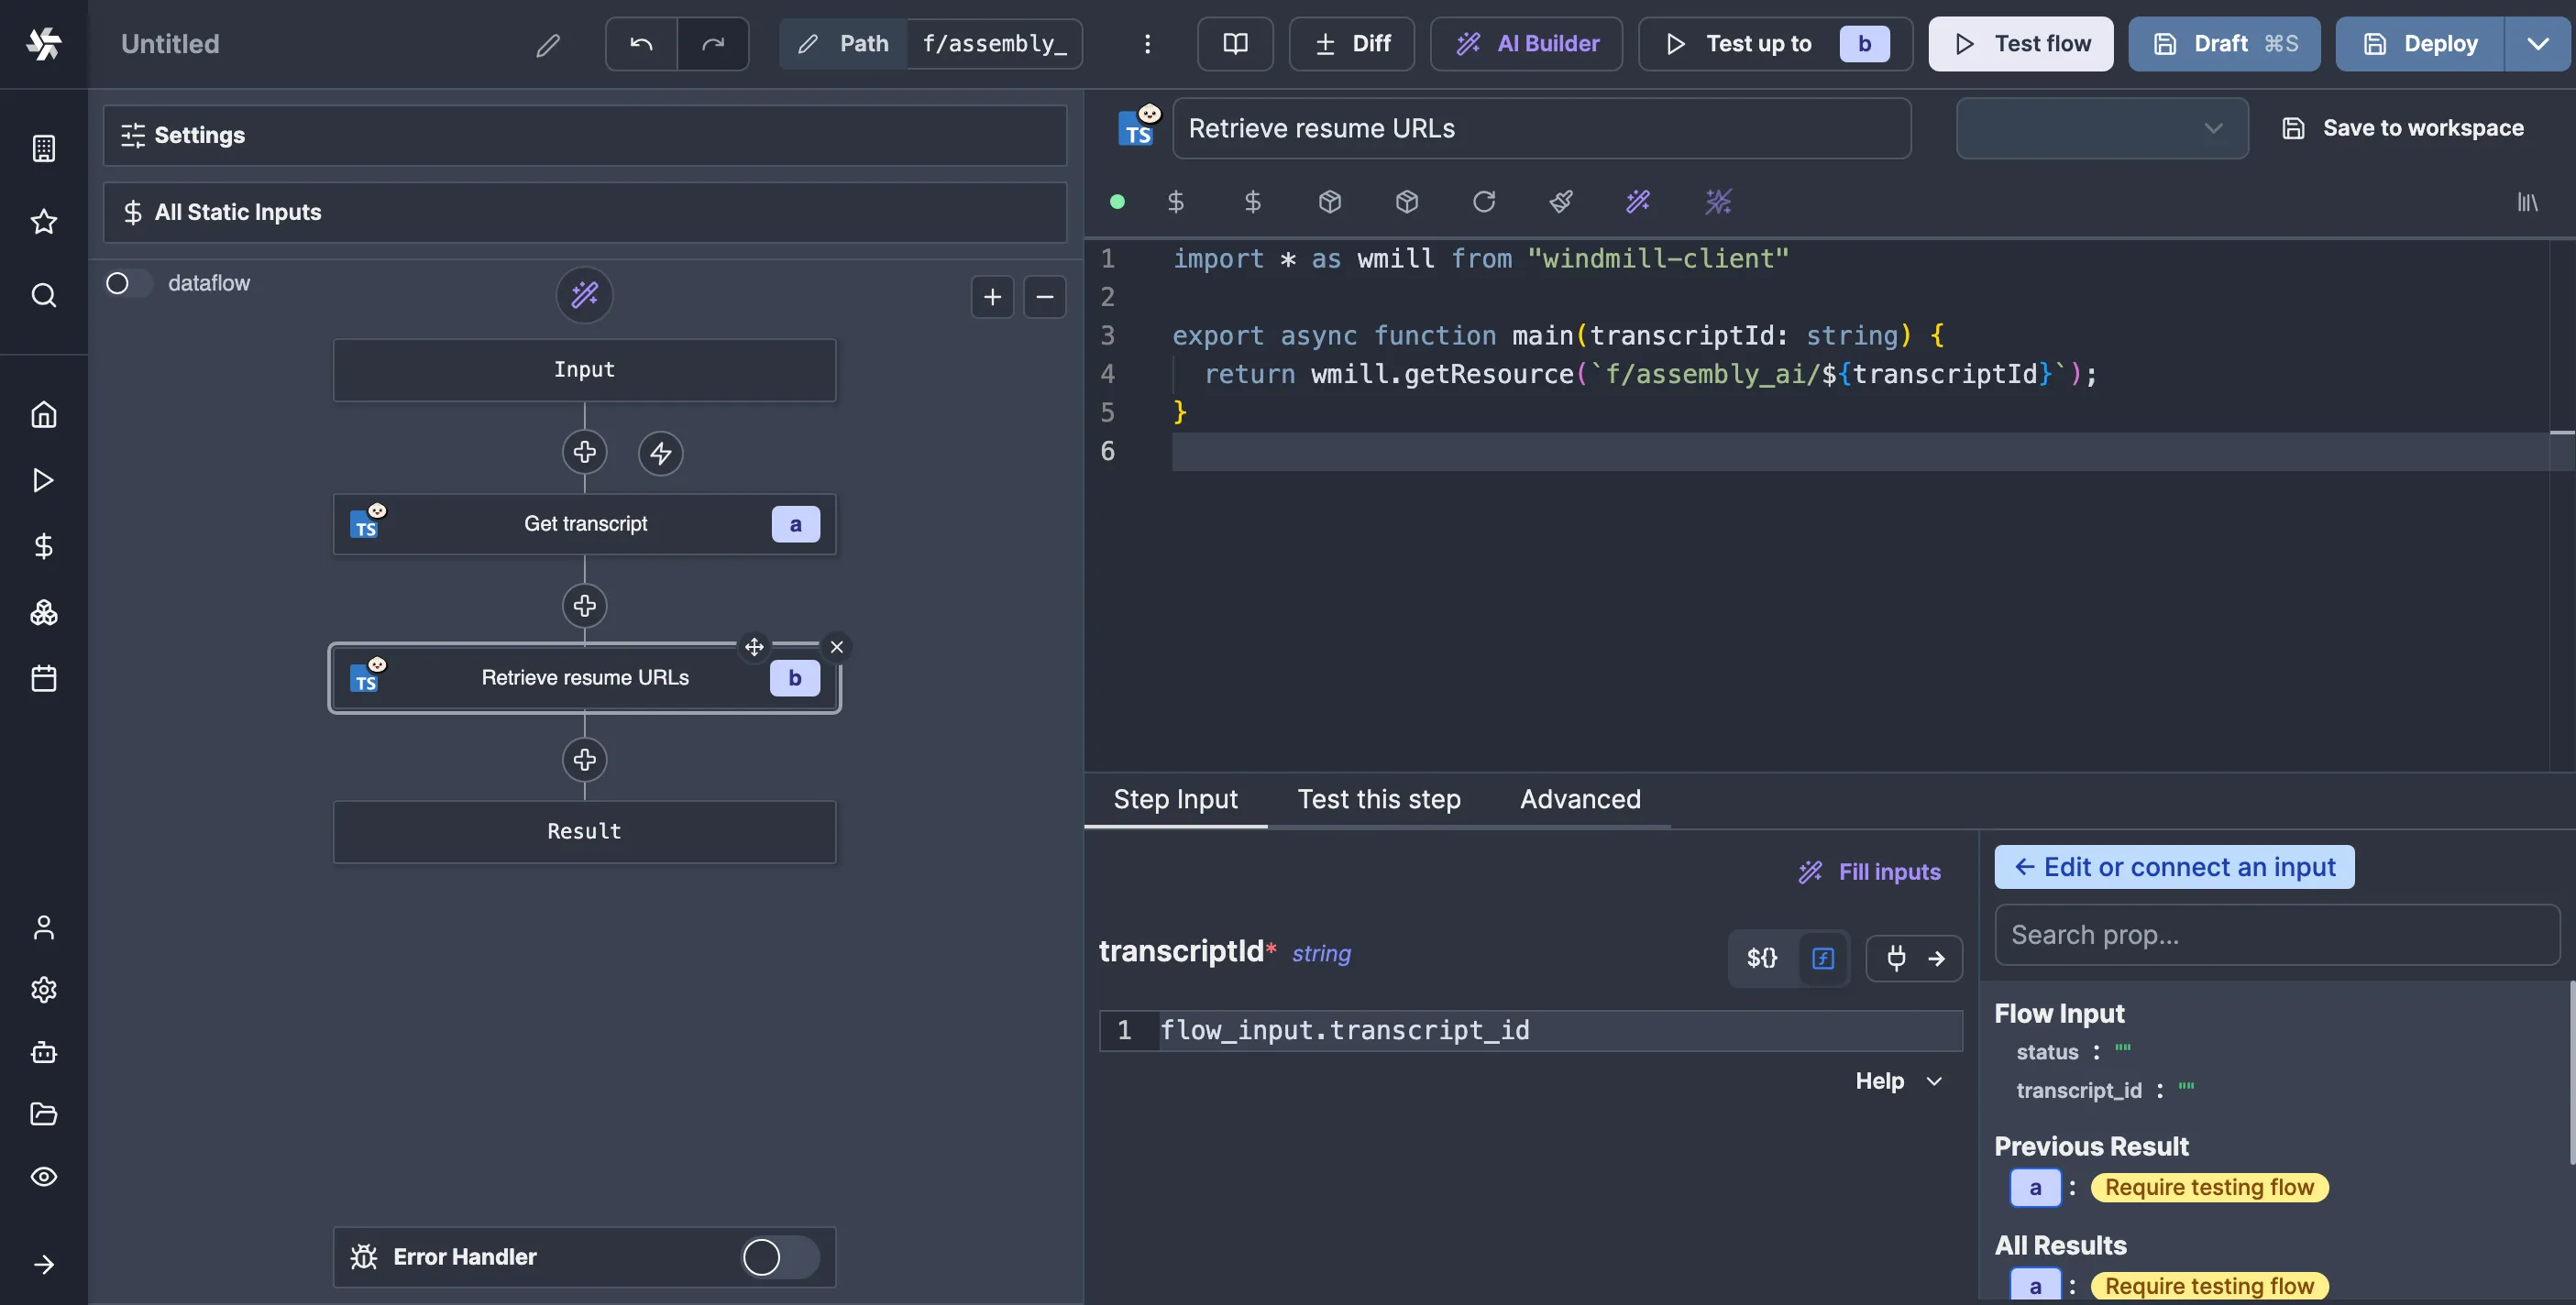
In any case, we now know what data our webhook receives, so let’s use it. Let’s pretend we don’t see the “status” field and focus on fetching the transcript results. We can do that with the AssemblyAI SDK again:
import { AssemblyAI } from "assemblyai"; type CAssemblyAi = { apiKey: string; }; export async function main( assemblyAI: CAssemblyAi, transcriptId: string, ) { const client = new AssemblyAI(assemblyAI); return client.transcripts.get(transcriptId); }
Now, we can test whether this works without triggering a new transcript by clicking “Test run” and then “Past Runs/Input library” to select the input we previously got:
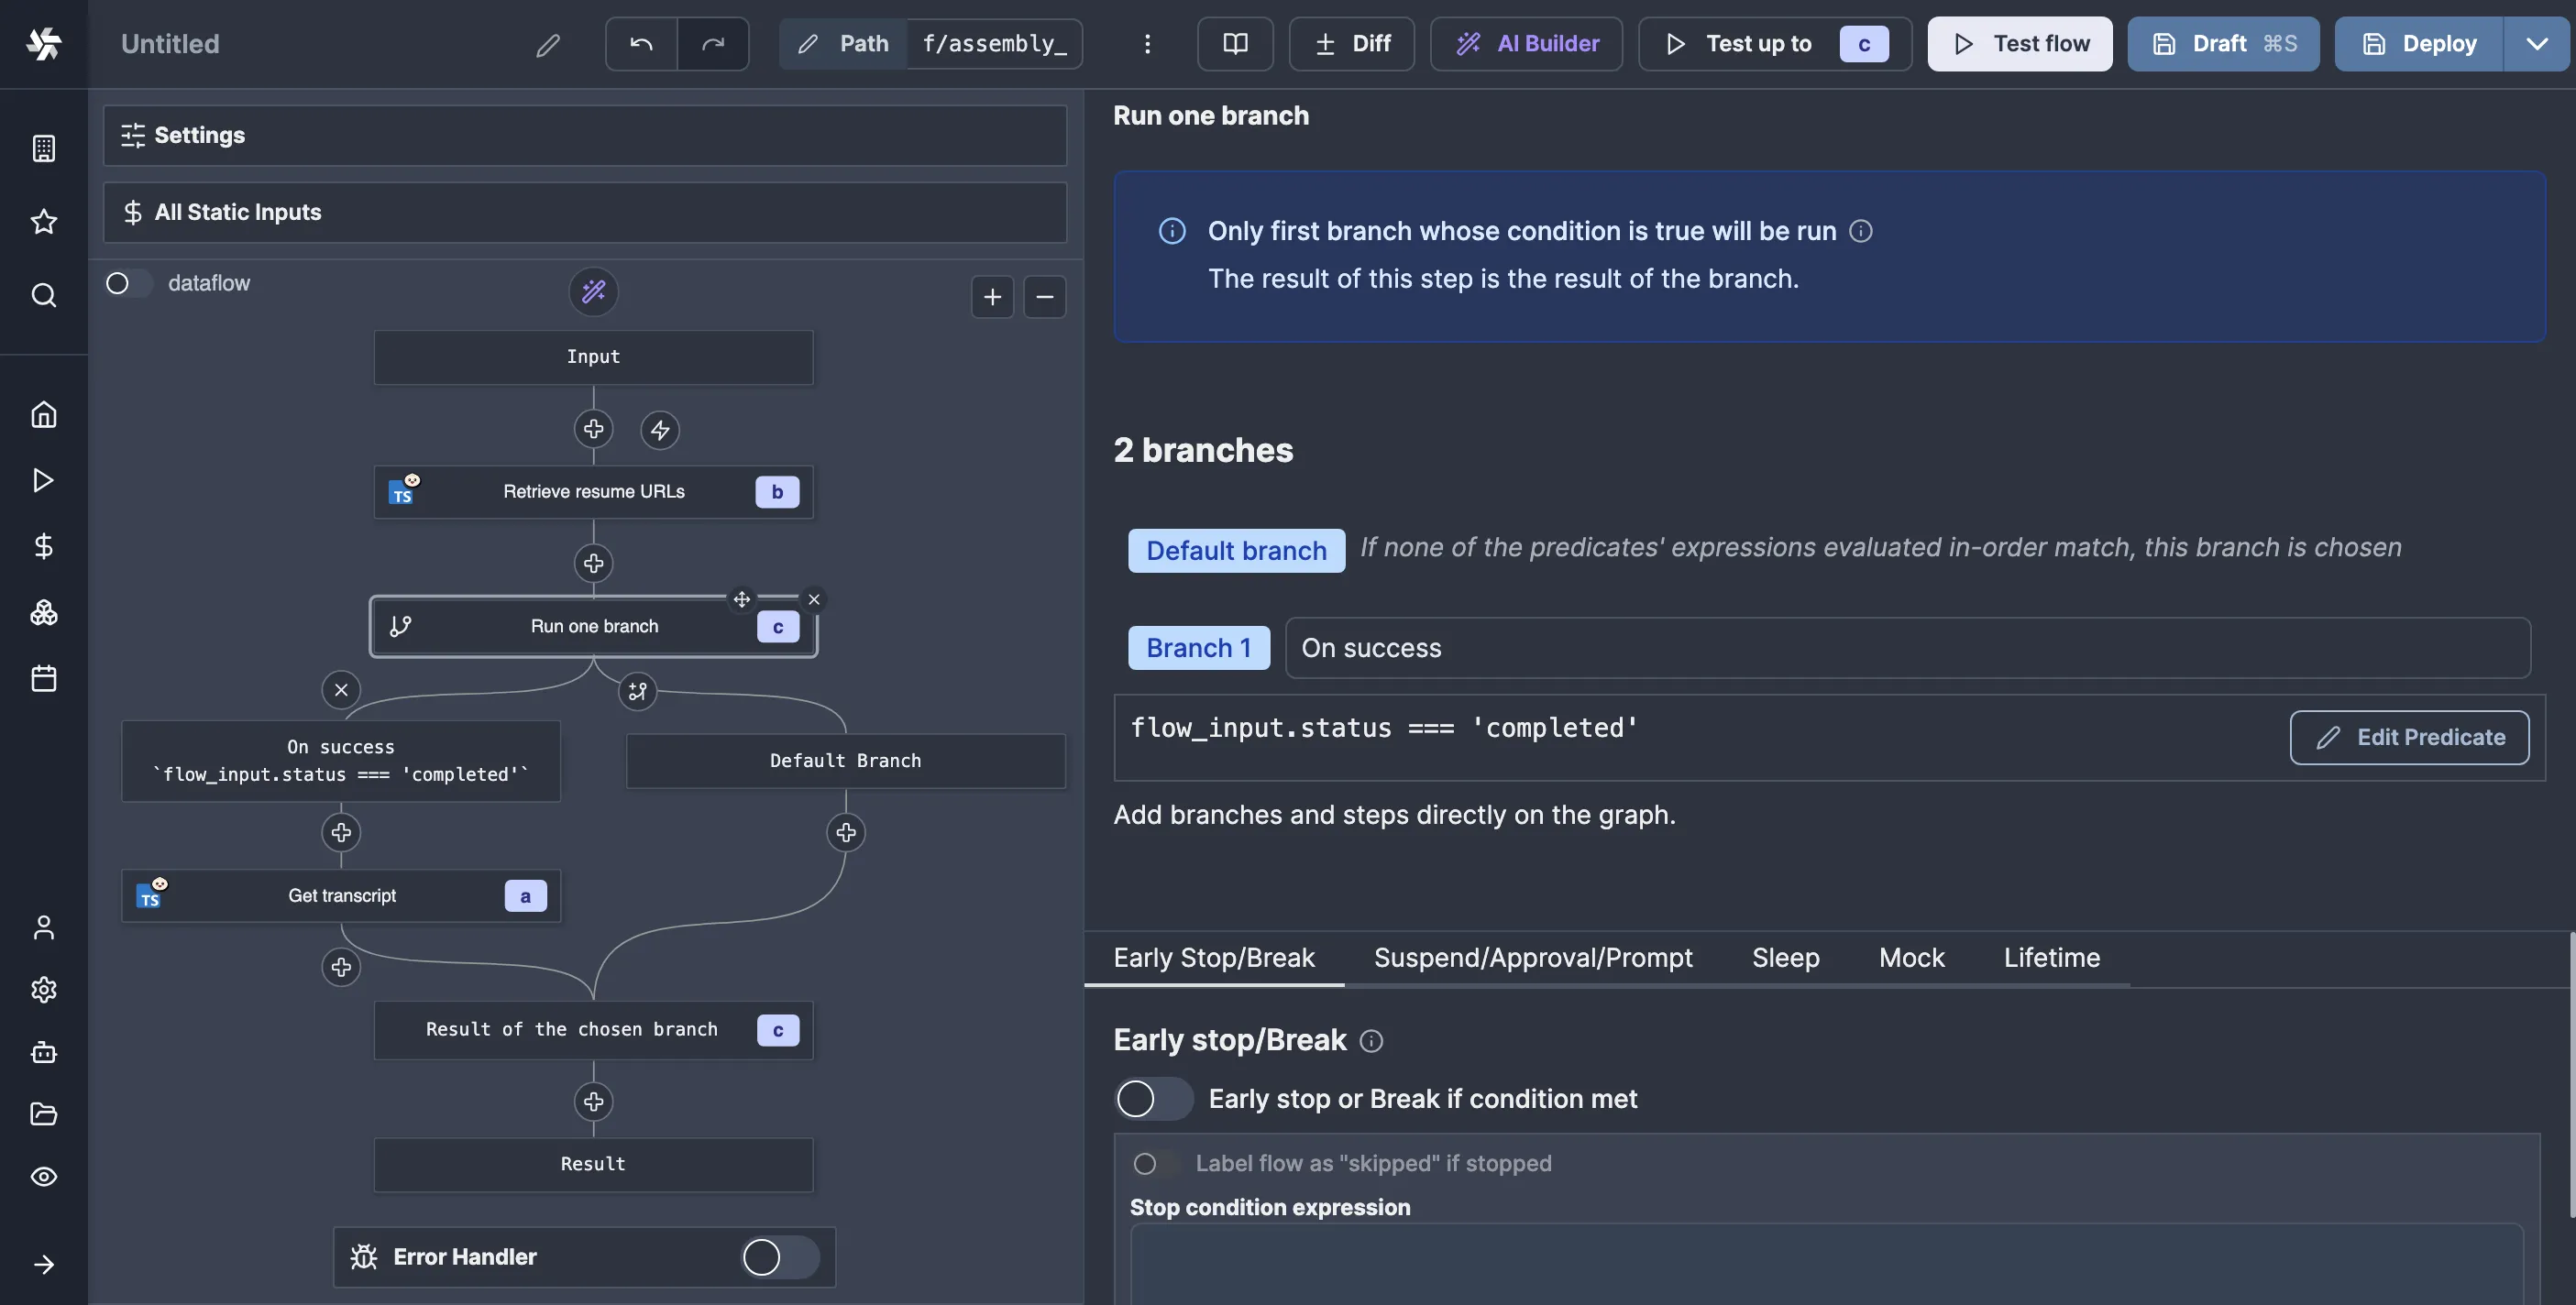
If we go to the transcribe flow again and click on the node that submits the transcription job, we can make it suspend the flow until manually resumed by going to “Suspend” in the “Advanced” tab:

getResumeUrls function from the Windmill client.
We need to get these URLs from the webhook flow somehow. Since we have the transcribe job ID on both ends, let’s store the resume and cancel URLs in Windmill state using the job ID as a key so that we can retrieve said state in the webhook flow:
import * as wmill from "windmill-client"; import { AssemblyAI } from "assemblyai"; type CAssemblyAi = { apiKey: string; }; type CWebhook = { url: string; token: string; }; export async function main( assemblyAI: CAssemblyAi, webhook: CWebhook, audioUrl: string, ) { const client = new AssemblyAI(assemblyAI); const job = await client.transcripts.submit({ audio_url: audioUrl, webhook_url: webhook.url, webhook_auth_header_name: "Authorization", webhook_auth_header_value: `Bearer ${webhook.token}`, }); const resumeURLs = await wmill.getResumeUrls("webhook"); // we need to pass some name for the approver await wmill.setResource( { resume: resumeURLs.resume, cancel: resumeURLs.cancel, }, `f/assembly_ai/${job.id}`, "state", ); return resumeURLs; }
Now, in the webhook flow, we can add a new node to retrieve the URLs like so:
Here is the script for resuming the flow with the data:
export async function main(resumeURL: string, data: object) { return fetch(resumeURL, { method: "POST", headers: { "Content-Type": "application/json", }, body: JSON.stringify(data), }); }
And here’s the script for canceling the flow:
export async function main(cancelURL: string) { return fetch(cancelURL, { method: "POST", }); }
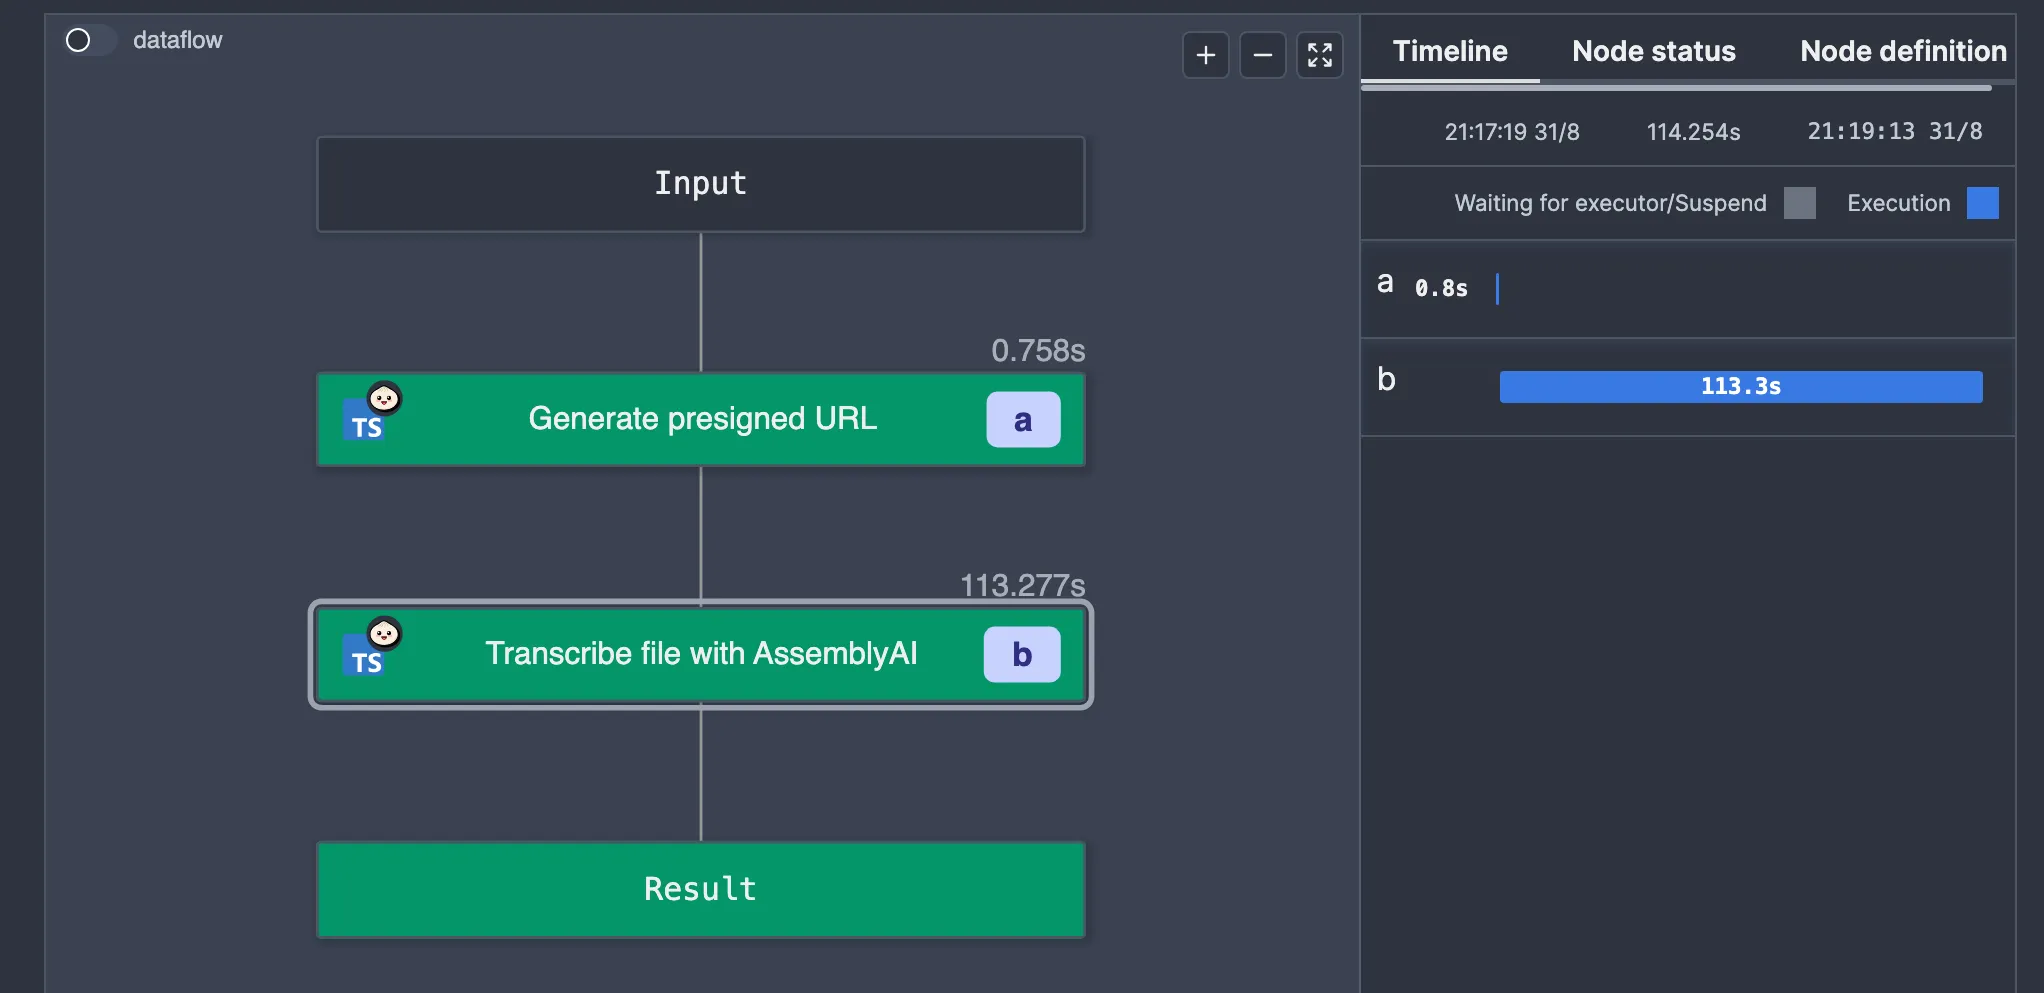
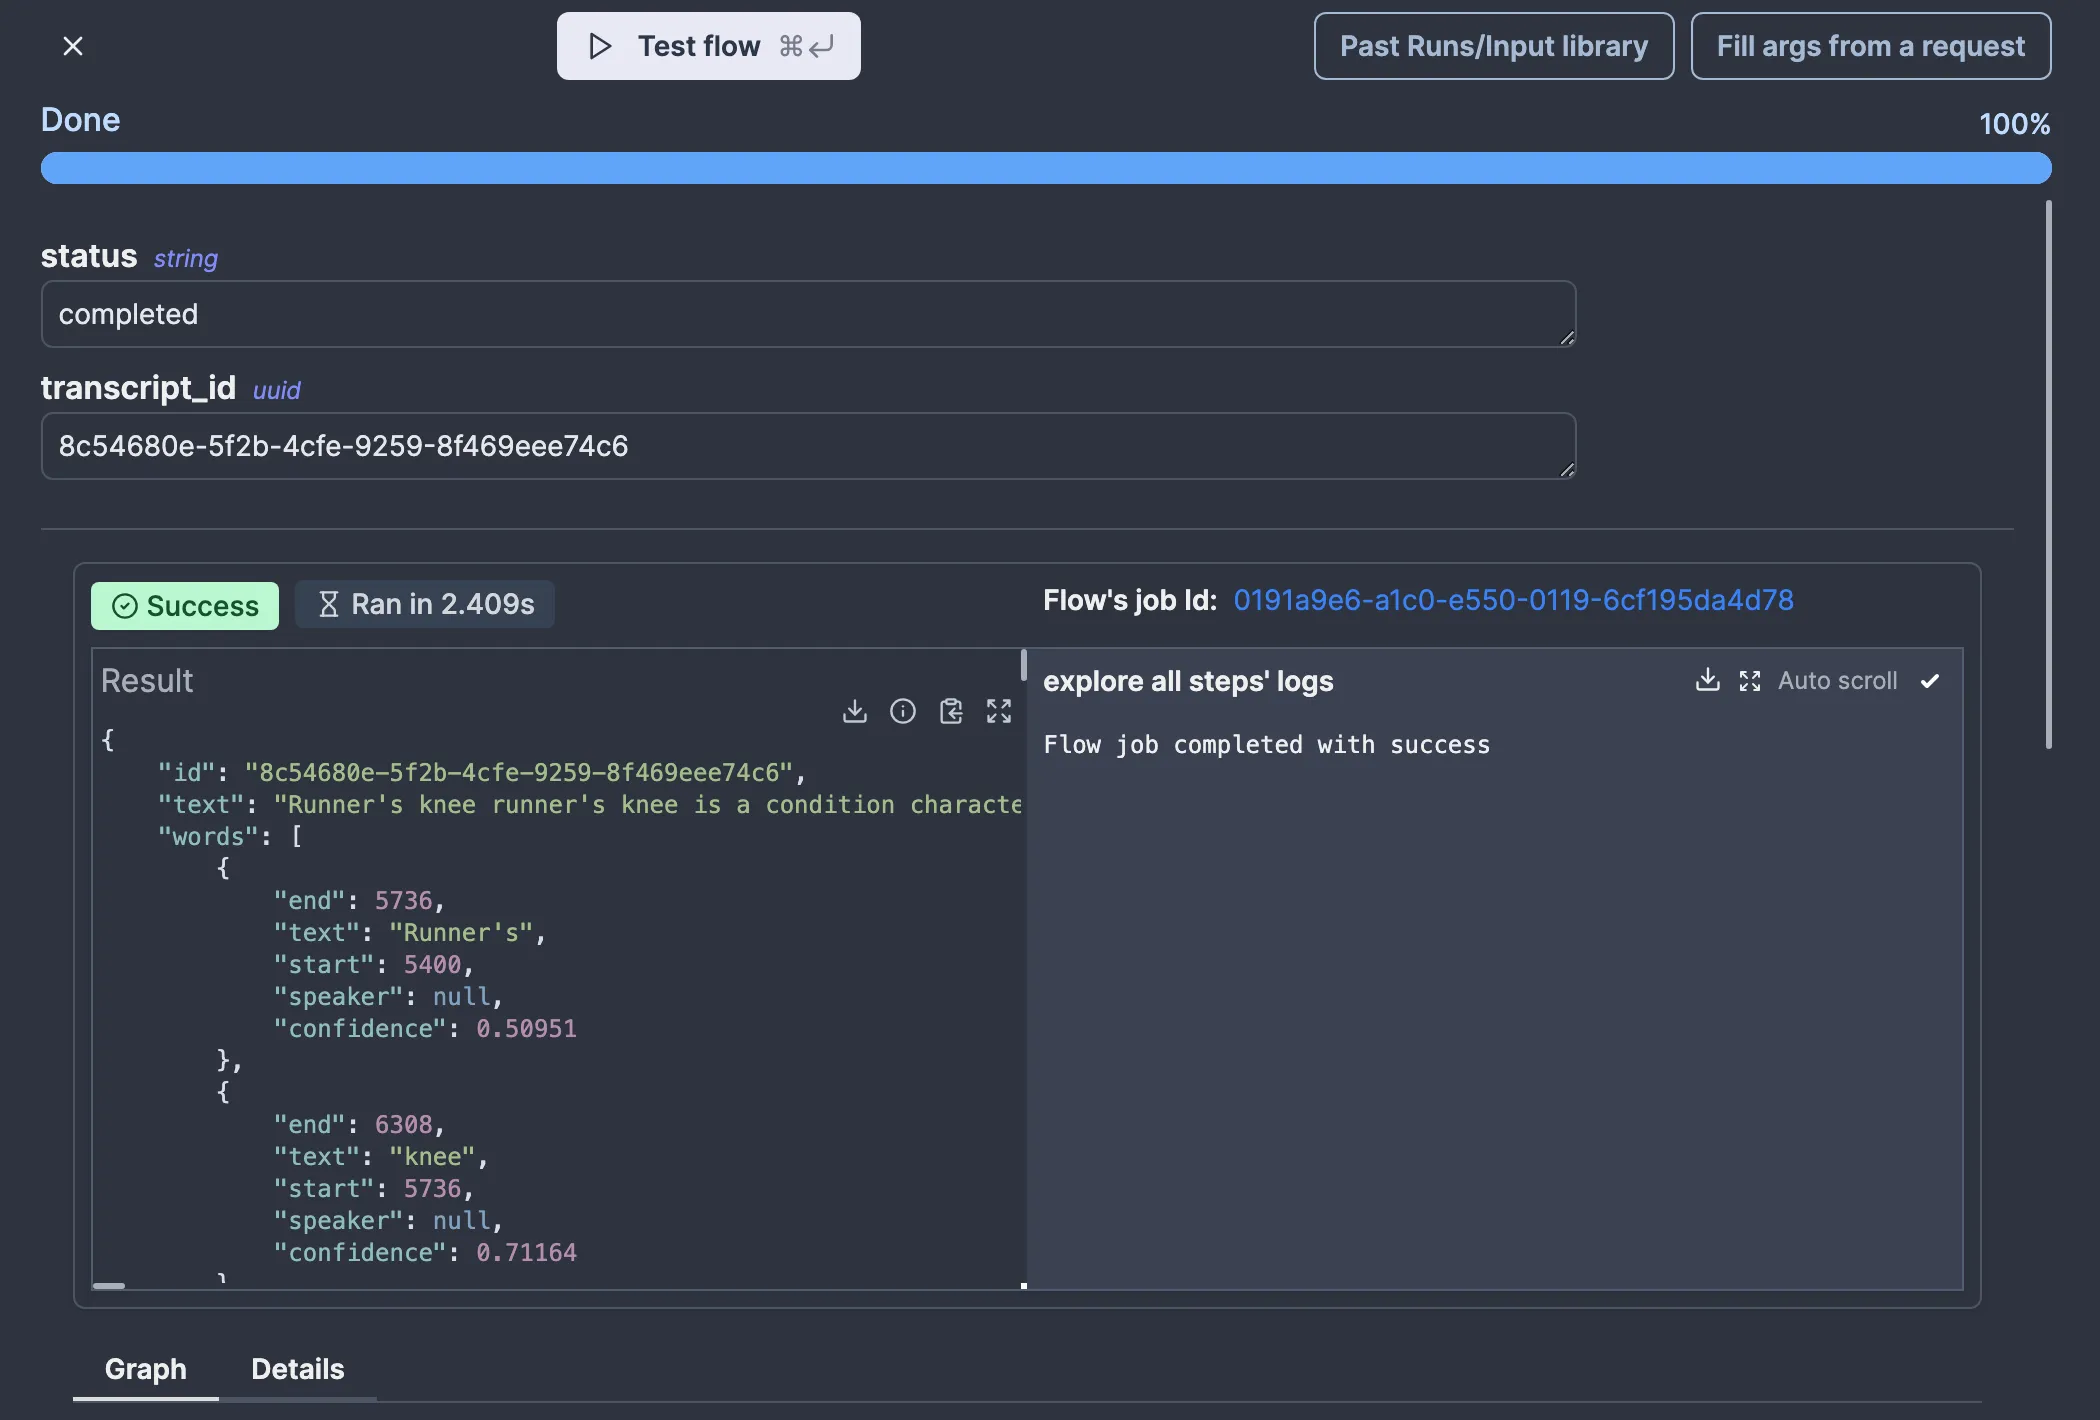
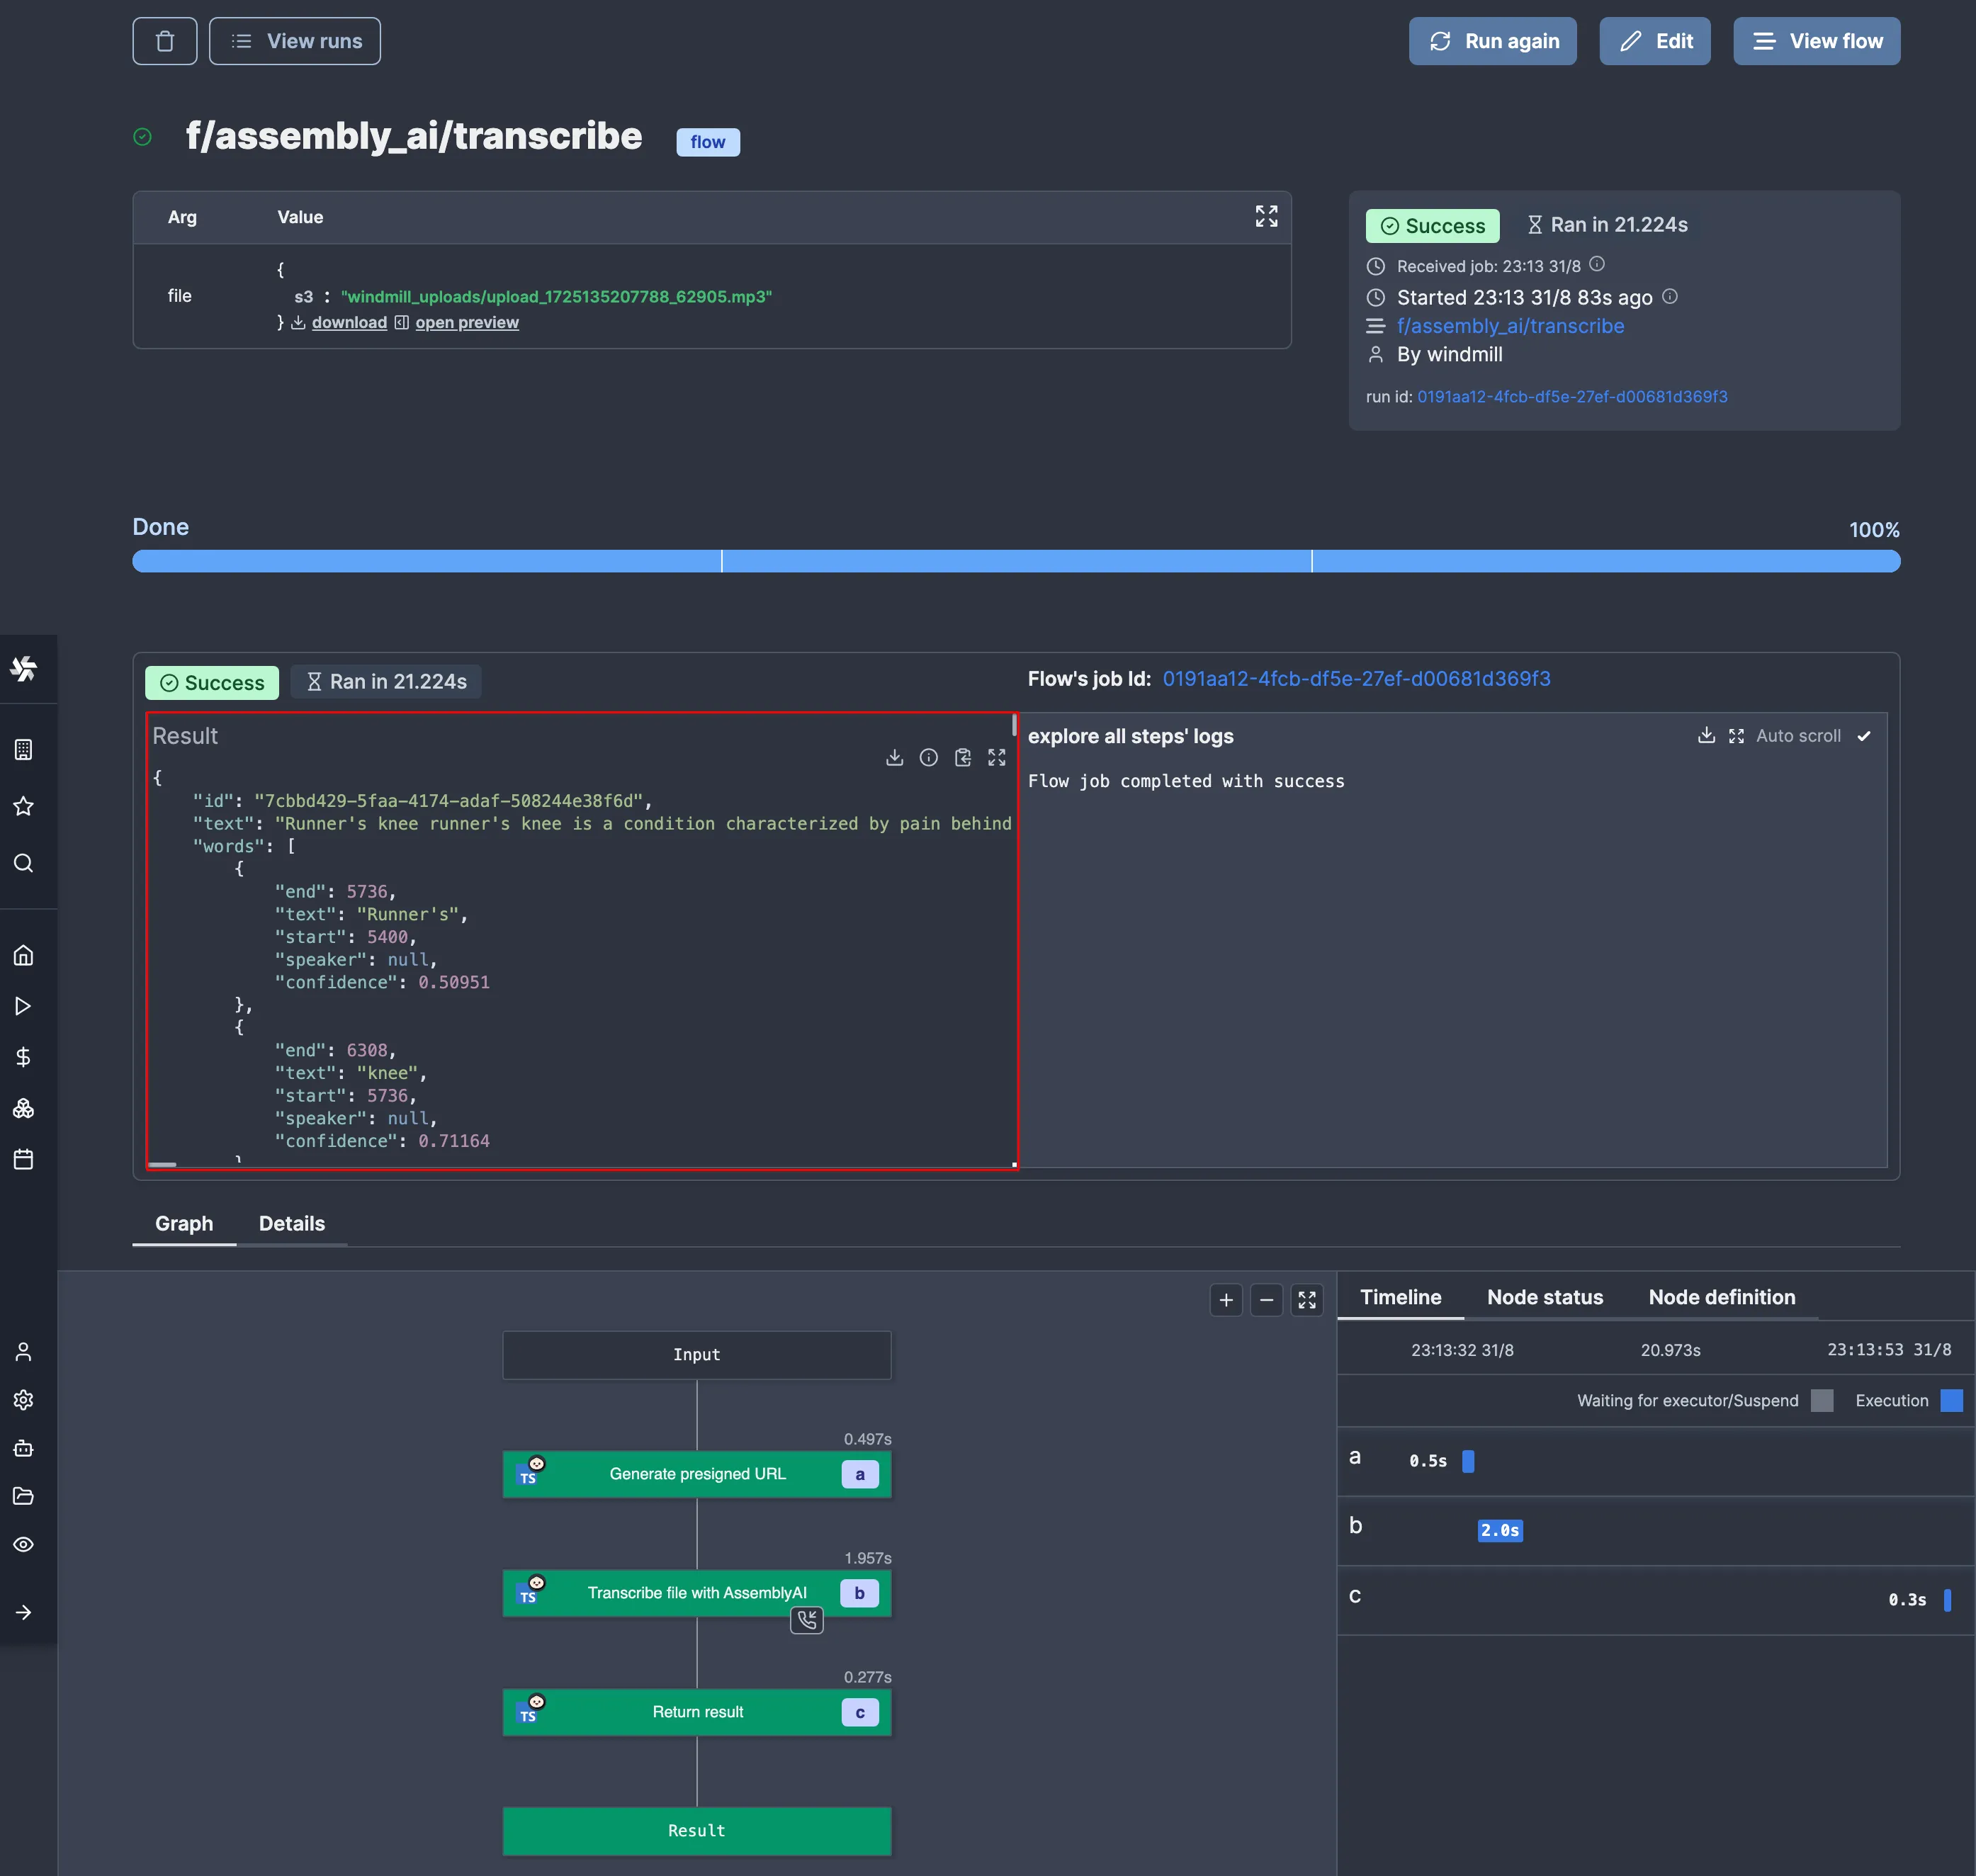
It's as simple as that! Now, let’s run the transcribe flow again and see what happens:

So, it worked, kind of. As you can see by the big gap in the timeline, we no longer have a worker polling for the result. The only issue is we don’t see the result.
The data passed to the resume URL is stored in the resume variable. Unfortunately, there is no way to simply tell Windmill to take that as the result of the flow, so we’ll need to make a script that takes it as an argument and returns it like so:
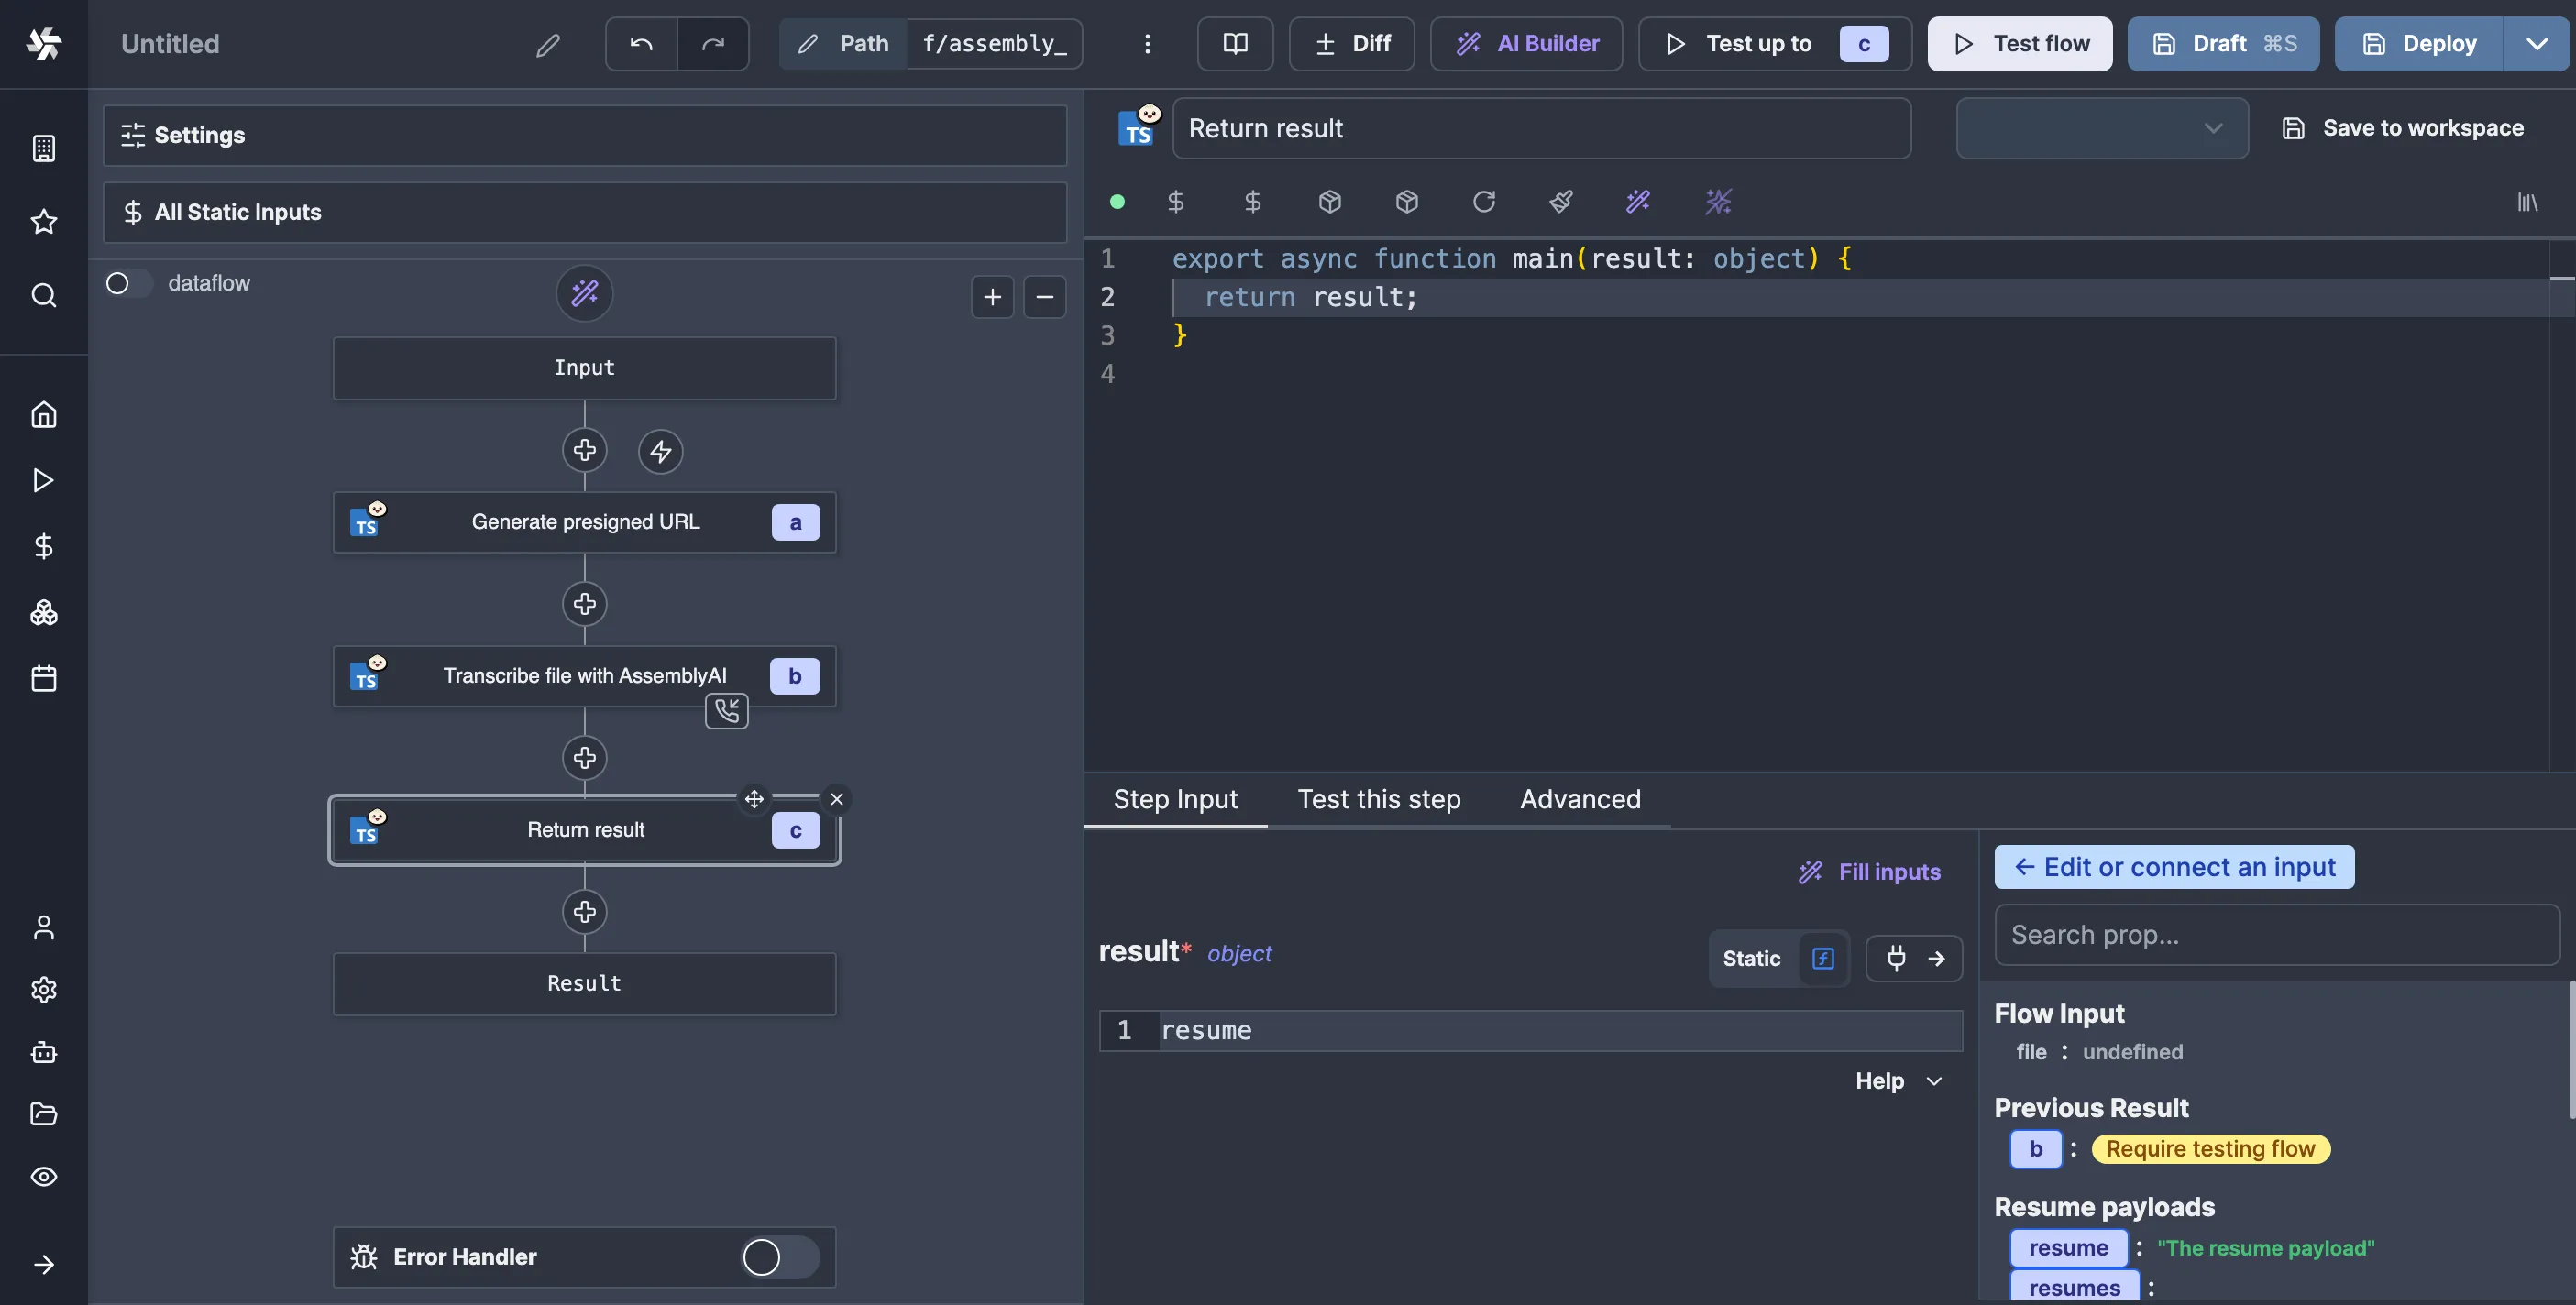
It’s silly, but it is what it is. With this out of the way, let’s try again:
## Conclusion
We've demonstrated how to efficiently handle long-running tasks using Windmill, specifically when dealing with external services. Using Windmill's features like webhooks, state management, and flow suspension, we created a resilient workflow that processes transcriptions without blocking workers. This approach is a template for managing various long-running tasks, showcasing Windmill's power in orchestrating complex workflows with external services.
Oh, and also, cleaning up the resume URL state resources is left as an exercise for the reader :)